Why I tried migrate to NGINX:
I launched my blog with LAMP installation (you can find steps to deploy in my previous article Setup WordPress with Apache and phpMyAdmin in a Docker container.
But, I’m disappointed with my site performance.
The following steps improved performance but not significantly:
- Installed and configured optimization plugins:
- Autoptimize
- Imagify
- Migrated my instance from home Raspberry PI 4 to AWS EC2.
But, I still had such performance:
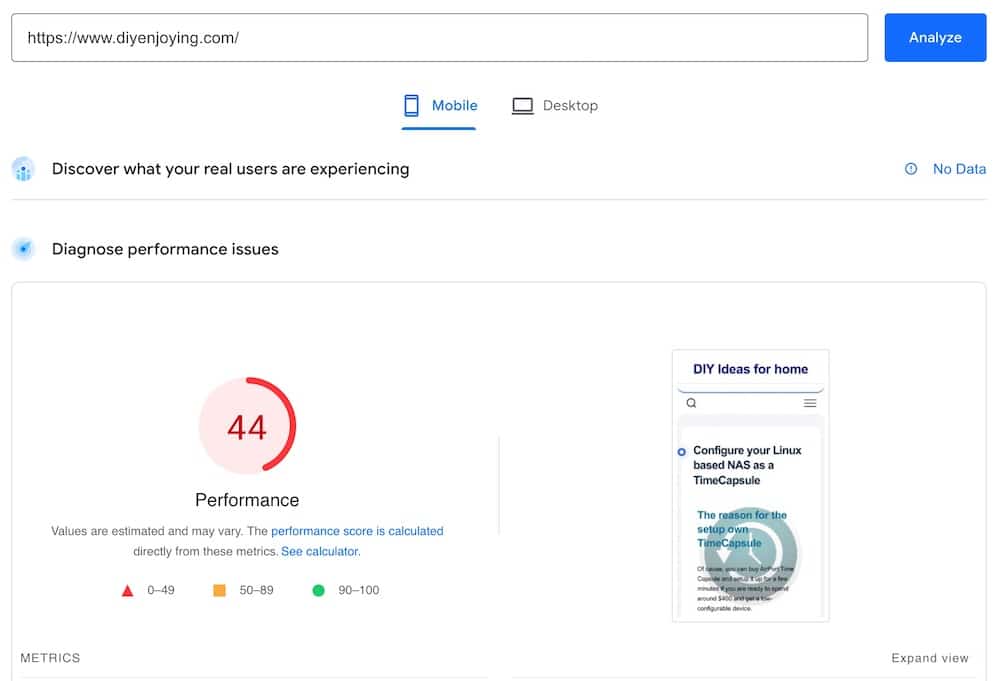
Hence, after a lot of research, I found that NGINX, PHP-FPM, and HTTP2 have to significantly improve the performance.
Hopefully, I launched my site with docker-compose and switching to another stack isn’t a big deal.
Let’s go though my journey and see the result!
Installation steps:
1. Docker Compose/PORTAINER and getting SSL certificate you can find in following articles:
“Install Docker-compose onto Raspberry OS”
Getting a free SSL certificate with LetLet’s Encrypt and CertBot in Docker container.
Setup WordPress with Apache and phpMyAdmin in a Docker container
NGINX Installation steps:
1. Prepare working directories:
host:# mkdir /opt/wordpress
host:# mkdir -p /var/log/nginx
host:# mkdir -p /opt/wordpress/etc/nginx/conf.d
host:# mkdir -p /opt/wordpress/etc/ssl
host:# cd /opt/wordpress
2. Prepare docker-compose.yml:
touch /opt/wordpress/docker-compose.yml
vi /opt/wordpress/docker-compose.yml
Please open your preferred text editor and configure your containers.
Please be aware that this is an example and you have to replace the following values with your real info:
- line 13,32,48,68: YourTimeZone
- line 14,17,34,72: Your passwords
- line 56: Must be commented with “#” at first launch, because Apache2 can’t be launched with empty configuration folder
version: '3.8'

services:

  mariadb:
    image: mariadb:latest
    container_name: mariadb
    hostname: mariadb
    volumes:
      - /opt/wordpress/mysql:/var/lib/mysql
      - /opt/wordpress/etc/mysql:/etc/mysql
    environment:
     - TZ=YorTimeZone
     - MYSQL_ROOT_PASSWORD=YorPassword
     - MYSQL_DATABASE=wordpress
     - MYSQL_USER=wordpress
     - MYSQL_PASSWORD=YorPassword
    networks:
      - wordpress


  phpmyadmin:
    image: phpmyadmin:latest
    container_name: phpmyadmin
    hostname: phpmyadmin
    depends_on:
      - mariadb
      - wordpress
    ports:
      - '8080:80'
    environment:
     - TZ=YorTimeZone
     - PMA_HOST=mariadb:3306
     - MYSQL_ROOT_PASSWORD=YorPassword
    networks:
      - wordpress

  nginx:
    image: nginx:latest
    container_name: nginx
    hostname: nginx
    depends_on:
     - wordpress
    ports:
      - 80:80
      - 443:443
    environment:
     - TZ=YorTimeZone
    volumes:
      - /opt/wordpress/html:/var/www/html
      - /opt/wordpress/etc/nginx/conf.d:/etc/nginx/conf.d
      - /opt/wordpress/etc/ssl:/etc/ssl
      - /var/log/nginx:/var/log/nginx
    networks:
      - wordpress


  wordpress:
    image: wordpress:php8.1-fpm
    container_name: wordpress
    hostname: wordpress
    depends_on:
     - mariadb
    ports:
      - 9090:9000
    environment:
      - TZ=YorTimeZone
      - WORDPRESS_DB_HOST=mariadb:3306
      - MYSQL_DATABASE=wordpress
      - WORDPRESS_DB_USER=wordpress
      - WORDPRESS_DB_PASSWORD=YorPassword
    volumes:
      - /opt/wordpress/html:/var/www/html
    networks:
      - wordpress

networks:
  wordpress:
    driver: bridge
2. Prepare NGINX config file:
touch /opt/wordpress/etc/nginx/conf.d/default.conf
vi /opt/wordpress/etc/nginx/conf.d/default.conf
# default.conf
# redirect to HTTPS
server {
listen 80;
listen [::]:80;
server_name $host;
location / {
# update port as needed for host mapped https
rewrite ^ https://$host:8443$request_uri? permanent;
}
}
server {
listen 443 ssl http2;
listen [::]:443 ssl http2;
server_name $host;
index index.php index.html index.htm;
root /var/www/html;
server_tokens off;
client_max_body_size 75M;
# update ssl files as required by your deployment
ssl_certificate /etc/ssl/fullchain1.pem;
ssl_certificate_key /etc/ssl/privkey1.pem;
# logging
access_log /var/log/nginx/wordpress.access.log;
error_log /var/log/nginx/wordpress.error.log;
# some security headers ( optional )
add_header X-Frame-Options "SAMEORIGIN" always;
add_header X-XSS-Protection "1; mode=block" always;
add_header X-Content-Type-Options "nosniff" always;
add_header Referrer-Policy "no-referrer-when-downgrade" always;
add_header Content-Security-Policy "default-src * data: 'unsafe-eval' 'unsafe-inline'" always;
location / {
try_files $uri $uri/ /index.php$is_args$args;
}
location ~ \.php$ {
try_files $uri = 404;
fastcgi_split_path_info ^(.+\.php)(/.+)$;
fastcgi_pass wordpress:9000;
fastcgi_index index.php;
include fastcgi_params;
fastcgi_param SCRIPT_FILENAME $document_root$fastcgi_script_name;
fastcgi_param PATH_INFO $fastcgi_path_info;
}
location ~ /\.ht {
deny all;
}
location = /favicon.ico {
log_not_found off; access_log off;
}
location = /favicon.svg {
log_not_found off; access_log off;
}
location = /robots.txt {
log_not_found off; access_log off; allow all;
}
location ~* \.(css|gif|ico|jpeg|jpg|js|png)$ {
expires max;
log_not_found off;
}
Please remember that all paths must be from the container point of view but not your hosting system.
Line #44: the socket address must be relevant inside docker network.
3. add SSL certificate and primary key to your instalation:
Please follow steps in the article “Obtain Free SSL certificate for your site“ and save your certificate: fullchain.pem and private key: privkey.pem.
Please pay attention to symlinks which CertBot provides for last versions of files.
Hence, don’t forget -L option for cp command and replace example.com with your domain name:
host:# cp -L /opt/certbot/etc/letsencrypt/live/example.com/fullchain.pem /opt/wordpress/etc/ssl/
host:# cp -L /opt/certbot/etc/letsencrypt/live/example.com/privkey.pem /opt/wordpress/etc/ssl/
As can you see configuring and preparing NGINX-based instances is much easier than Apache-based.
But, I don’t think that it’s a huge advantage if you don’t need to prepare a dozen such installations daily.
Launch your docker-compose and check if your WordPress is accessible from browser with link https://www.yourdomain.com
host:# cd /opt/wordpress
host:# docker-compose up --remove-orphans
Please remember that your domain can be accessed from your local network in the following cases:
- If your domain is resolved by public DNS.
But, your router has to permit access to your public IP with port forwarding from your local network. - If you have your own DNS server in your local network and it’s configured to resolve your domain into your local IP.
- You added appropriate record for your WordPress instance to hosts file on your desktop.
3. Run wordpress container as a service with systemd:
A manual run and stop of a container is suitable for debug and experiments, but this approach isn’t convenient for everyday usage.
Please find how to run your docker-compose as a service with systemd in the article Setup WordPress with Apache and phpMyAdmin in a Docker container
4. compare NGINX setup with Apache
My apache setup can work with HTTP/1.1 due to the limitations of preinstall in WordPress container.
host:# curl -I --http2 -s https://www.diyenjoying.com/ | grep HTTP
HTTP/1.1 200 OK
But NGINX successfully configured with HTTP/2
host:# curl -I --http2 -s https://www.diyenjoying.com/ | grep HTTP
HTTP/2 200
So, I have modern instance with NGINX, PHP-FPM and HTTP2 – sounds inspiring!
But what about performance in comparison to Apache.
It definitely must be better!

As can you see with NGINX I got performance three times lower than with Apache!
So, reverted back Apache-based solution for my blog…
I’d like to see your questions or comments for this post!
Because I don’t why more modern stack gives lower performance than older one.
