In the age of smart homes, achieving optimal comfort and energy efficiency has never been easier. One innovative solution is automating window blinds with Home Assistant, by leveraging solar irradiance sensors. You can use hardware sensors for measuring sunlight intensity or RESTful sensors to get sunlight intensity from Forecast.Solar API, for controlling your blinds to dynamically adjust based on solar data— keeping your rooms cool, reducing glare, and saving energy without manual intervention. In this article, we’ll explore how to integrate solar irradiance sensors with Home Assistant to automate your window blinds, transforming your living space into a smarter, more comfortable environment while maximizing energy efficiency.
HOME ASSISTANT Configuration
Triggers Creation
Set up a trigger for blind closing.
- First, open your Home Assistant settings and go to Automations and Scenes.
- Now, tap the “Create Automation” button, and then choose “Create new automation” from the options.
- Next, select “Add Trigger” to define what will start the automation.
- Type “numeric” to find and choose “Numeric state trigger”.
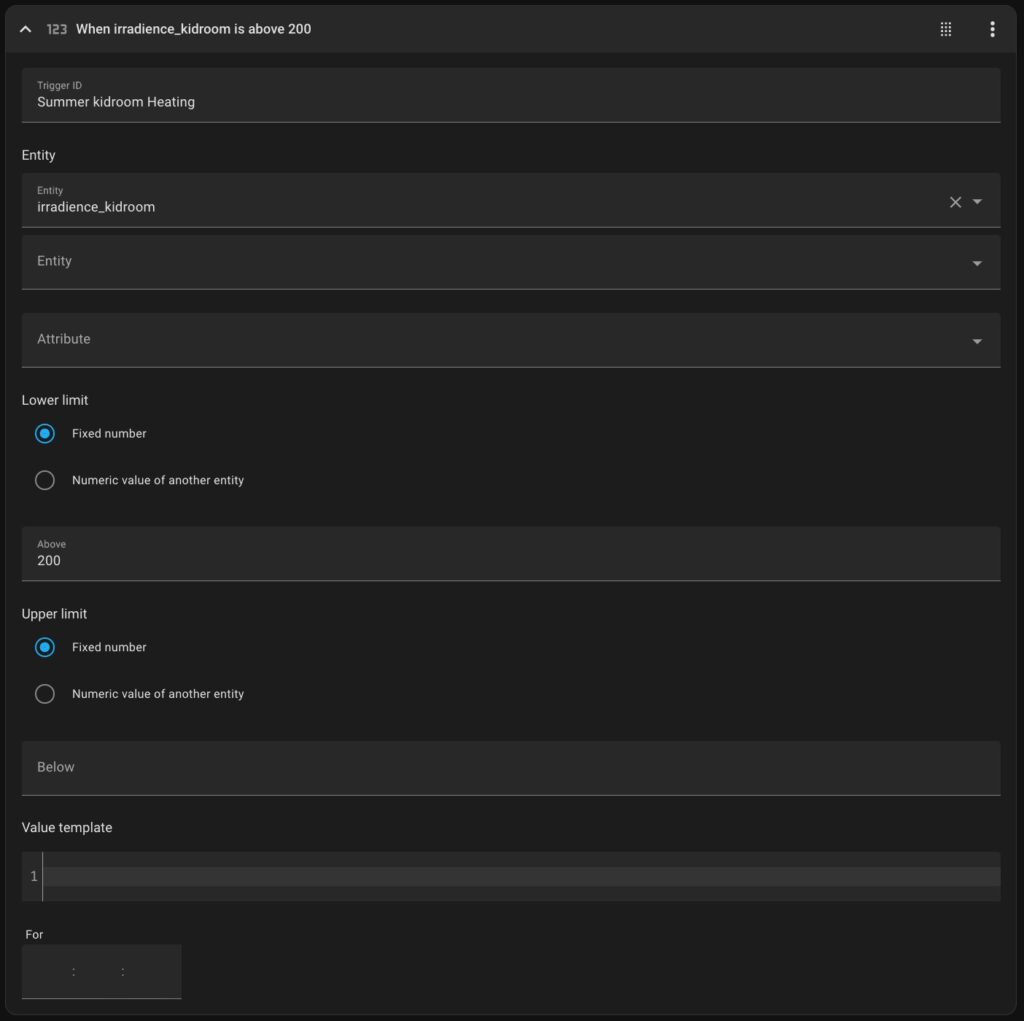
Now, let’s configure the trigger by filling in the following fields:
- Entity — this should be your solar irradiance sensor.
- Above — enter the irradiance level that must be reached for your blinds to close.
Hopefully, you followed my advice from the previous article and already figured out the right threshold by observing your sensor’s values over time.
And one more thing — don’t forget to name your trigger!
You can do that by clicking the three-dot menu on the trigger card. Giving it a clear name will make it much easier to reference later when linking actions to this trigger.
The first trigger is ready. The yaml code illustrated below:
trigger: numeric_state
entity_id:
  - sensor.irradience_kidroom
id: Summer kidroom Heating
above: 200
Set up a trigger for blind opening.
Now, let’s add trigger for blinds opening:
- Click on “Add Trigger” again to add your next trigger.
- Type “numeric” to find and choose “Numeric state trigger”.
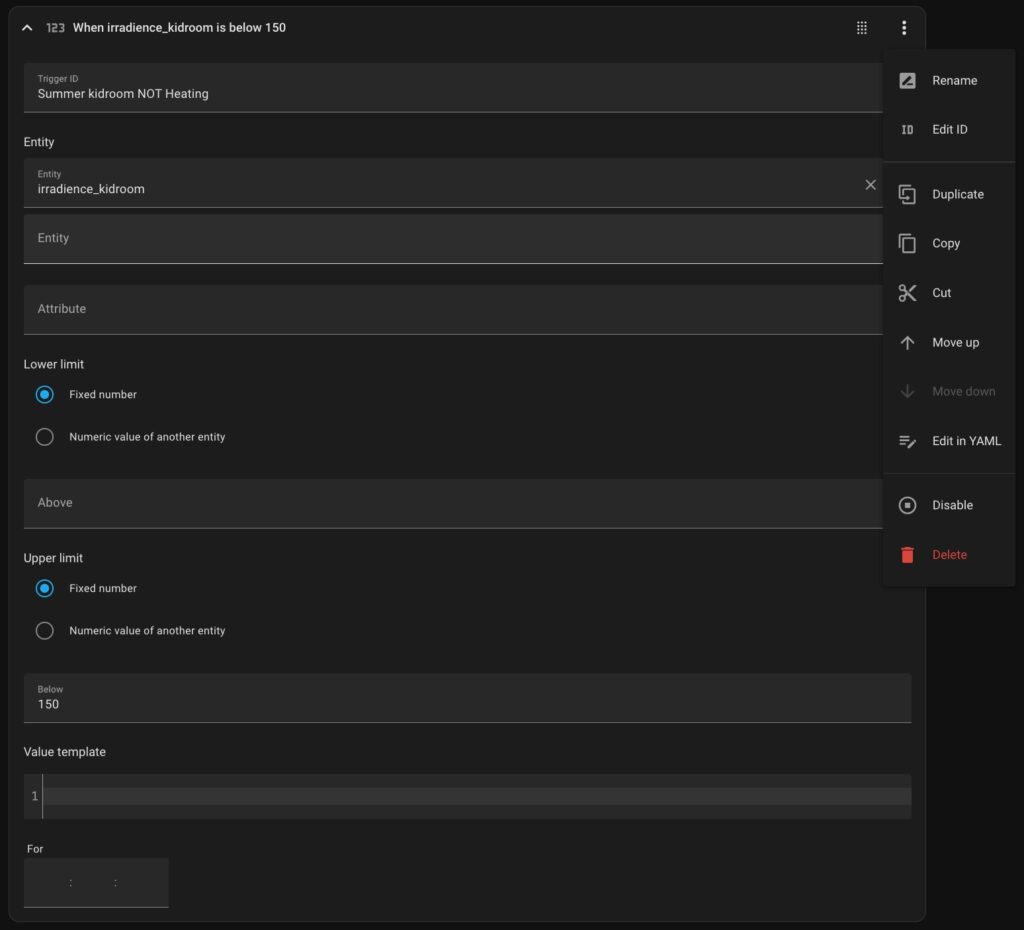
Now, configure your second trigger starting by filling in the following fields:
- Entity — this should be your solar irradiance sensor.
- Below — enter the irradiance level that must be reached for your blinds to open.
And one more thing — don’t forget to name your trigger!
You can do that by clicking the three-dot menu on the trigger card. Giving it a clear name will make it much easier to reference later when linking actions to this trigger. The yaml code is illustrated below:
trigger: numeric_state
entity_id:
  - sensor.irradience_kidroom
id: Summer kidroom NOT Heating
below: 150
Surprisingly, those two triggers alone aren’t enough to keep your room comfortable.
You might have already noticed that your sensor can show a high irradiance level — even when there’s no direct sunlight coming through your window.
That state is illustrated in the image below:
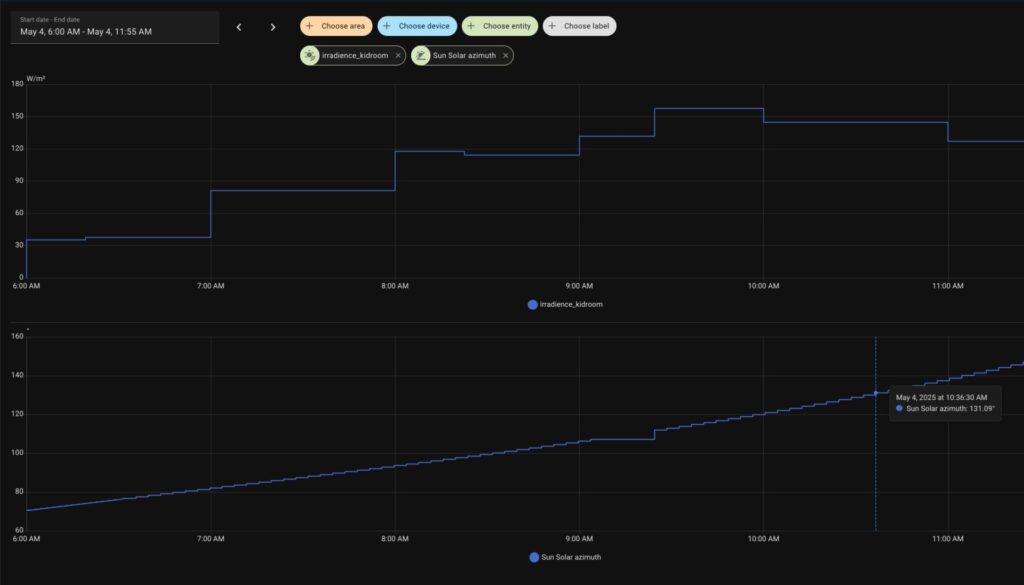
This window faces east, so there’s no direct sunlight once the sun’s azimuth goes beyond 130 degrees.
However, even without direct sunlight, the irradiance reading can still be quite high because of indirect light.
But here’s the key point: indirect sunlight doesn’t significantly heat your room, so in that case, it’s actually better to leave the blinds open.
Now, just a quick note — the sun.azimuth attribute is disabled by default in Home Assistant.
So before you continue with the automation, you’ll need to enable it.
📌 Important note: Don’t forget to save your automation and name it, otherwise you will start from the very beginning!
Here’s how:
- Go to Settings > Devices & Services.
- Find and click on your Sun integration.
- Then, click on “1 service” under the integration.
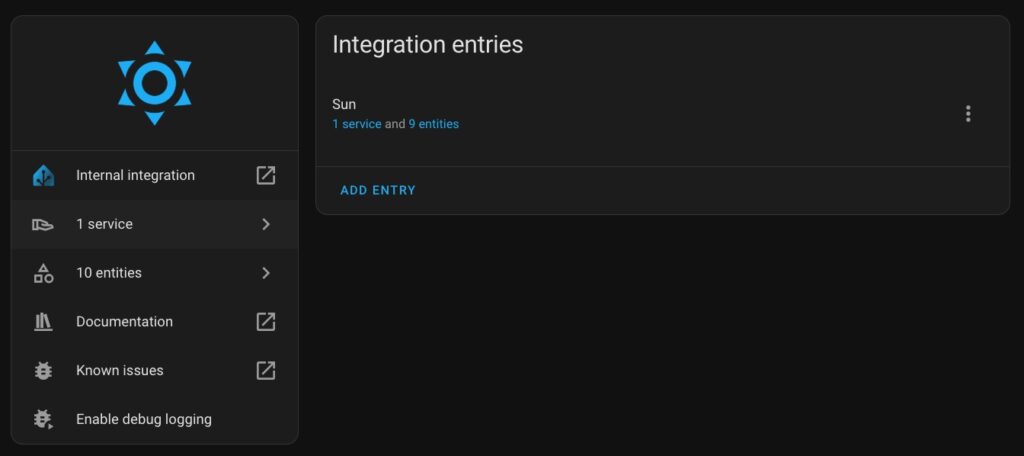
Now, you can see enabled and disabled Sun’s entities:
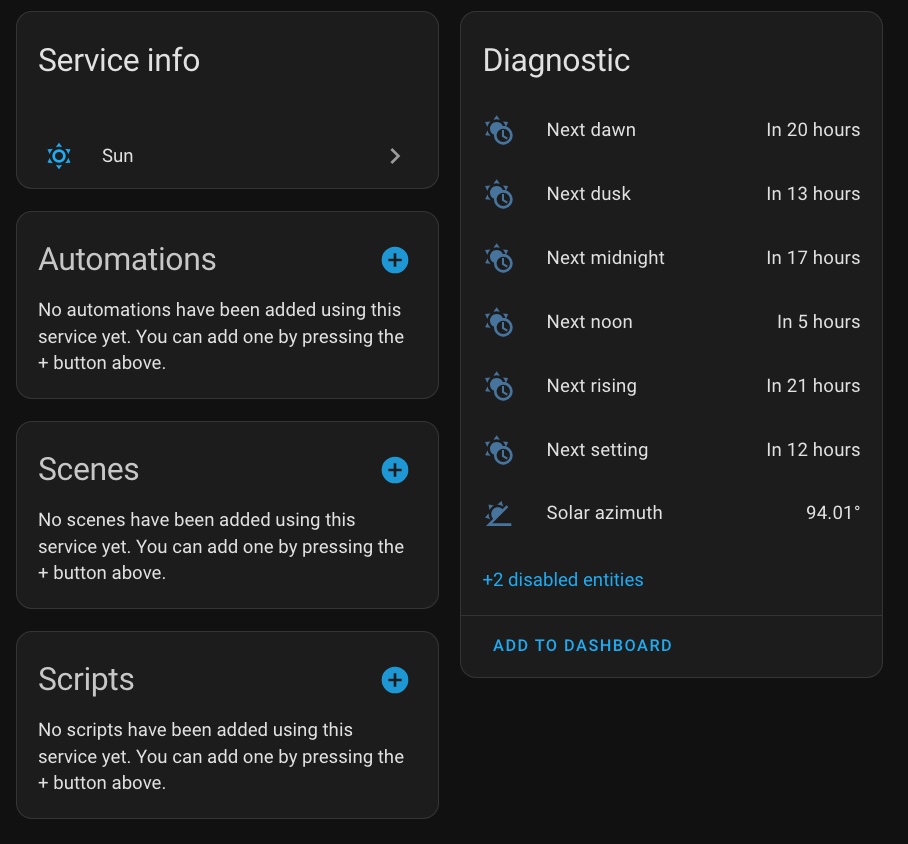
To enable the Azimuth attribute, just follow these steps:
- In the Sun integration, click on “Disabled entities.”
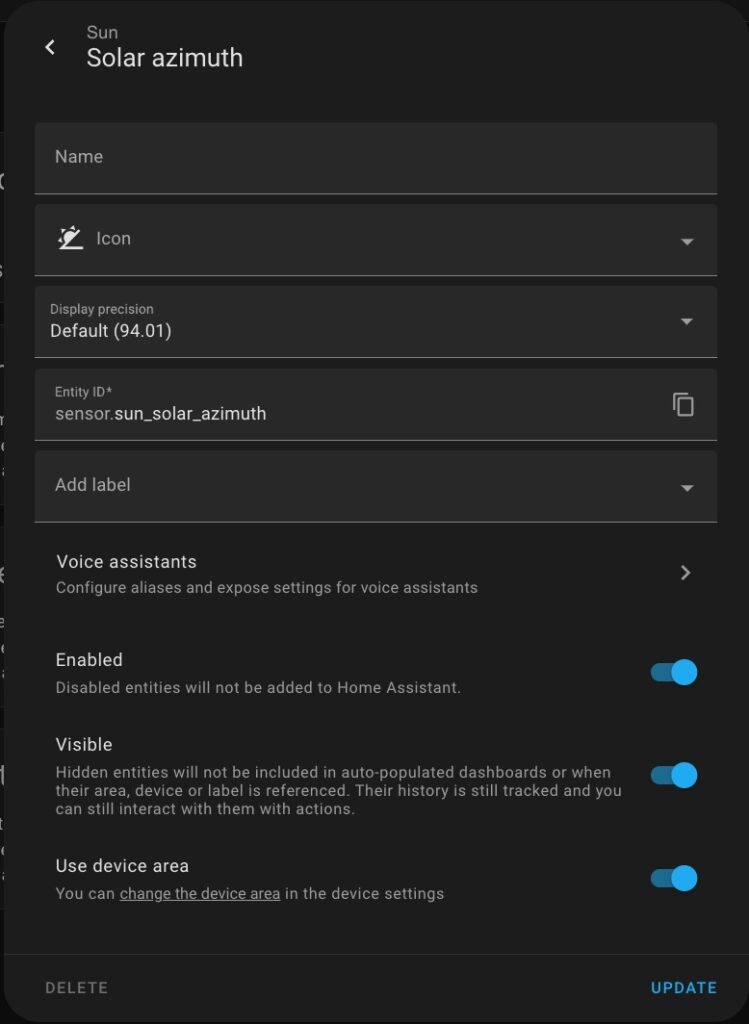
- Find and click on “Solar azimuth.” You’ll see a card that says “This entity is disabled.”
- Click the gear icon to open the settings.
- Turn on the “Enabled” switch.
- Finally, click “Update.”
That’s it — the azimuth attribute is now active and ready to be used in your automation. So, let’s add the third trigger:
- Revert back to Automations and Scenes.
- Now, find your saved automation and “Add Trigger” to define what will start the automation.
- Type “numeric” to find and choose “Numeric state trigger”.
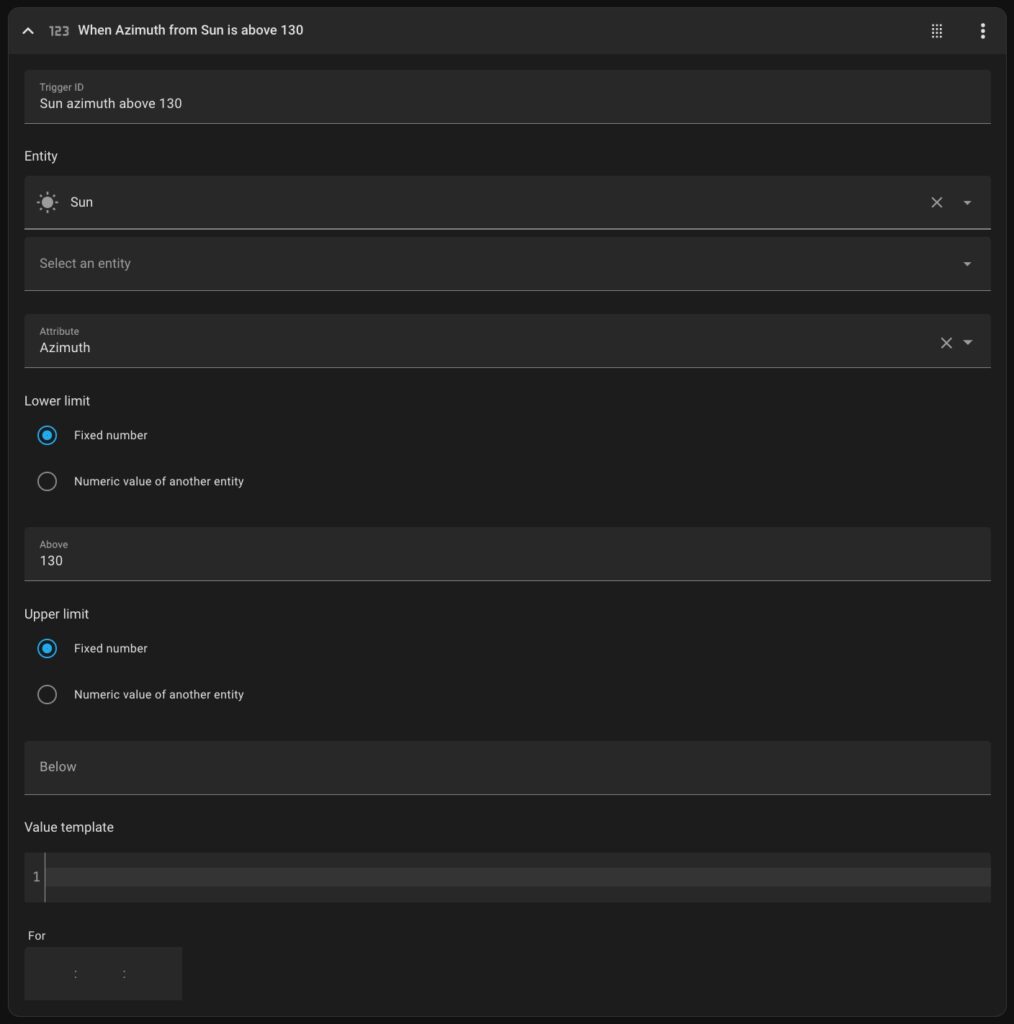
Now it’s time to set up your third trigger.
- For Entity, select Sun.
- Then choose the Azimuth attribute.
In the Above field, enter the sun azimuth value that marks the point when direct sunlight stops entering your room.
Once that’s set, all three triggers are ready — and you can move on to creating the actions for your automation. See the yaml code below:
trigger: numeric_state
entity_id:
  - sun.sun
id: Sun azimuth above 130
attribute: azimuth
above: 130
Adding Actions
Set up an action for blind closing.
Now, scroll down to the “Then do” section of your automation and click on the “+ Add Action” button.
From the list of available actions, select “Choose”. This gives your automation the flexibility to take different actions depending on which trigger was activated.
By default, the first option under the “Choose” action is already added.
Open it, and click “+ Add Condition”. Then, select “Triggered by” from the condition types.
You’ll see a list of your defined triggers — simply choose the one that should trigger your blinds to close.
Next, click “+ Add Action” under that same option, and select “Cover: Set Position”.
Then, click “Choose device” and select your blind controller from the list.
Once you’re done, your setup should look similar to the example shown in the image below.
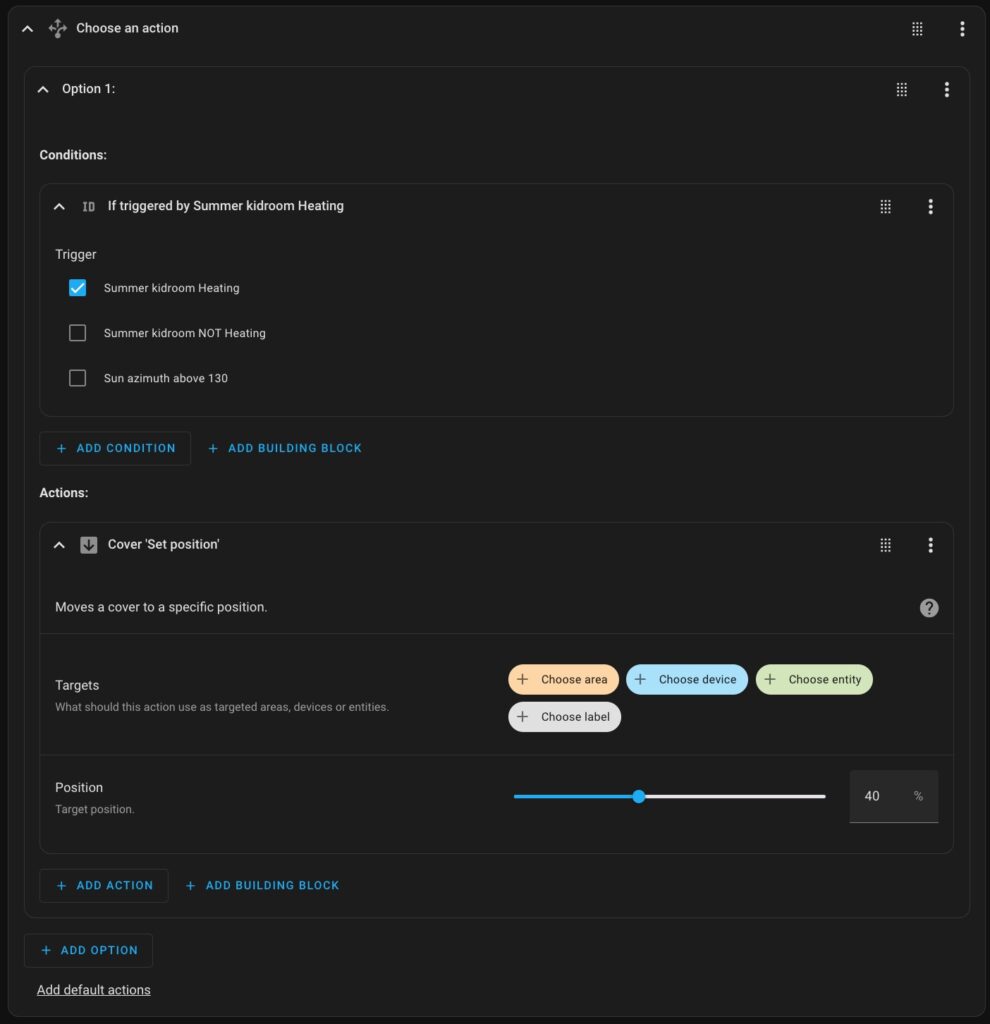
📌 Important note:
As you can see, I’ve set the opening position to 40%. That’s because I’m using exterior roller shutters, and for me, 40% strikes a good balance — it helps reduce heat buildup in the room, while still letting in enough natural light to keep the space comfortably lit.
Set up an action for blind opening.
Now, let’s add a second scenario — one for opening the blinds.
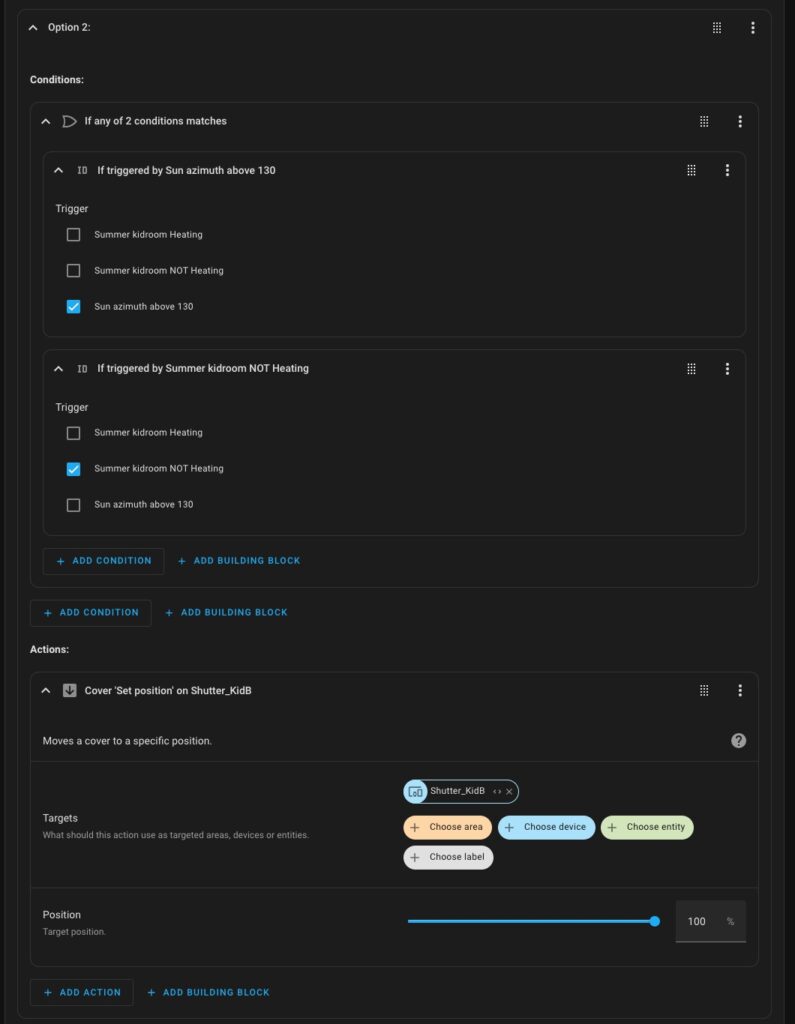
Click “+ Add Option” to create a new path in your Choose action.
Then, under Option 2, click “+ Add Condition” and select “OR” as the condition type.
We’re using OR because the blinds should open in either of these two cases:
The solar irradiance level drops below your defined threshold.
The sun’s azimuth shifts far enough that there’s no more direct sunlight on your window.
Now, under “If any condition matches”, click “+ Add Condition” and choose “Triggered by”.
From the list, select your irradiance sensor trigger, the one with the “below” condition.
Then, click “+ Add Condition” again in that same section, and once more choose “Triggered by.”
This time, select the azimuth trigger — the one you created earlier when the sun moves out of direct view.
Next, let’s define the action.
Click “+ Add Action” under this option and choose “Cover: Set Position.”
Set the position to 100%, which fully opens the blinds.
From my experience, using Set Position is more convenient than Cover: Open, because it gives you more control if you need to fine-tune it later.
Finally, click “Choose device” and select your blind controller.
When you’re finished, your automation should resemble the example shown in the image below.
Also, you can check the yeml code for your action and compare with the sample:
choose:
  - conditions:
      - condition: trigger
        id:
          - Summer kidroom Heating
    sequence:
      - action: cover.set_cover_position
        metadata: {}
        data:
          position: 40
  - conditions:
      - condition: or
        conditions:
          - condition: trigger
            id:
              - Sun azimuth above 130
          - condition: trigger
            id:
              - Summer kidroom NOT Heating
    sequence:
      - action: cover.set_cover_position
        metadata: {}
        data:
          position: 100
        target:
          device_id: YOUR_DEVICE_ID
Hardware recommendations
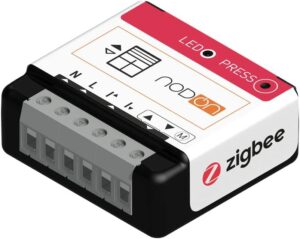
This description contains affiliate links. As an Amazon Associate, I earn from qualifying purchases.
Automation polishing
The automation we’ve just created works well, but for best practice, it’s a good idea to check the current position of your blinds before sending any command.
Why? Because if the blinds are already in the correct position, sending another command can unnecessarily activate the motor. That might cause shaking, and over time, it won’t do your motor any favors in terms of longevity.
So, adding a simple condition to check the current position before taking action is a smart way to make your automation both smarter and more hardware-friendly.