Why Use Timers in Home Assistant?
Step 1: Set Up a Timer Helper
First things first, you need a timer in Home Assistant. If you haven’t set one up yet, here’s how to do it via the UI:
- Navigate to Settings: Go to Settings > Devices & Services > Helpers.
- Create a Timer: Click the “+” button to add a new helper, then select the “Timer” option.
- Configure the Timer: Give it a name (e.g., test_timer) and set an initial duration, like 00:15:00 (15 minutes). You can also enable the “Restore” option to ensure the timer resumes its state after a restart.
- Add an icon (e.g., mdi:av-timer) for your timer to improve visibility in your list of helpers.
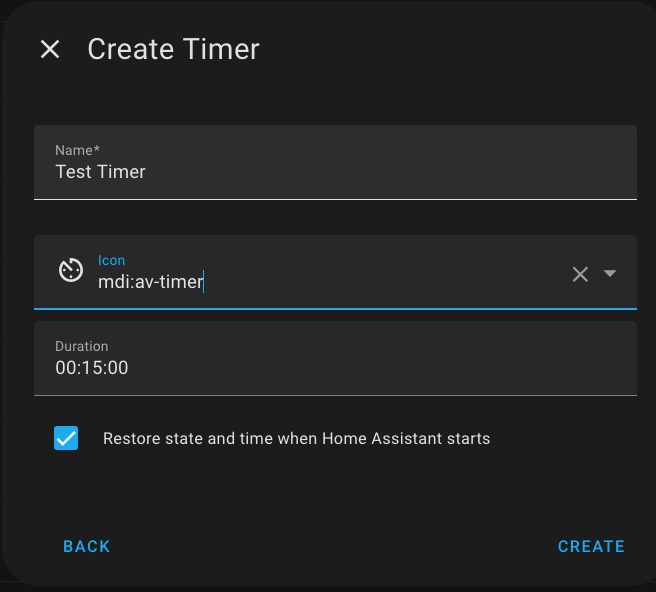
- Click “Create” to finish.
Your timer is now ready to use! But the initial duration you set here is just a starting point—we’ll adjust it dynamically next.
Step 2: Create an Input Number Helper for Dynamic Duration
To change the timer duration from the UI, you’ll need a way to input a new duration value. This is where an Input Number helper comes in—it lets you create a slider or number field in the UI to set the desired duration.
- Go to Helpers Again: Back in Settings > Devices & Services > Helpers, click the “+” button.
- Add an Input Number: Select the “Number” option.
- Configure the Input Number: test_timer_duration for example.
- Set the minimum value to 0, maximum to 60 (for 60 minutes, or 1 hour), and step to 1 (for 1-minute increments), or whatever parameters your need.
- Click “Advanced Settings” and choose “Input field” mode for a more precise duration, especially on a mobile phone.
- To improve visibility in your list of helpers, you can add an icon to your number entity — for example, use
mdi:av-timer. It makes it easier to identify the entity at a glance, especially when managing multiple similar ones.
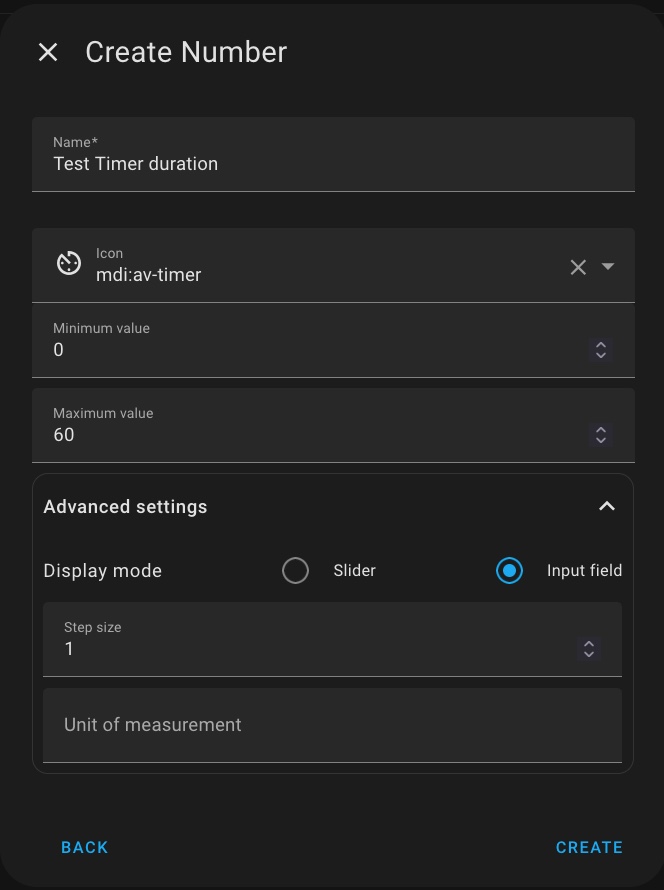
- Click “Create”.
Now you have a helper for your UI that lets you select a duration between 0 and 60 minutes.
Step 3: Write a script start and stop your timer with a defined duration
Start the Timer
To conveniently start or stop your timer, whether from an automation or manually through the UI, you’ll need to create a script.
- Go to Automations: Navigate to Settings > Automations & Scenes > Scripts tab, then click “Create Script”.
I prefer using a single script that both starts and stops the timer, to keep all logic in one place. We’ll do this by using a “Choose” action that checks the timer’s state.
Under Option 1, we’ll define the logic to start the timer:
Click “+ Add Condition” and choose “State.”
In the Entity field, enter your timer’s entity ID, for example:
timer.test_timer.In the State field, type
idle(this is the state when the timer is not running).
Now add the action to start the timer:
Click “+ Add Action.”
Choose “Timer: Start” as the action type.
Under Target, click “Choose Entity” and select your timer.
Enable the Duration field and add this template:
{{(states('input_number.test_timer_duration') | int) * 60 }}As a result your “Option 1” should look like illustrated on the picture below:
📌 Explanation:
Replace input_number.timer_duration with the entity ID of your actual number helper.
The multiplier of 60 is used because the timer duration must be defined in seconds, while using minutes is generally more convenient in the UI and for number helpers. So, converting minutes to seconds ensures the timer works correctly while keeping the interface user-friendly.
Stop the Timer
Now that Option 1 starts the timer when it’s idle, let’s add Option 2 to stop the timer when it’s running or paused.
Click “+ Add Option” to create a second option.
Under “Conditions,” click “+ Add Condition” and select “State.”
In the Entity field, enter your timer’s entity ID (e.g.,
timer.test_timer).In the State field, enter
active.Now, under “Actions,” click “+ Add Action”
Choose “Timer: Cancel” as the action.
Under Target, click “Choose Entity” and select your timer.
As a result your “Option 2” should look like illustrated on the picture below:
And that’s it! Now your script can start the timer if it’s idle, or stop it if it’s running or paused, all within a single, clean automation.
📌 Important:
Don’t forget to save your script and name it e.g. Test_timer_script
The yamp code of the script is illustrated below:
sequence:
  - choose:
      - conditions:
          - condition: state
            entity_id: timer.test_timer
            state: idle
        sequence:
          - action: timer.start
            metadata: {}
            data:
              duration: "{{(states('input_number.test_timer_duration') | int) * 60 }}"
            target:
              entity_id: timer.test_timer
      - conditions:
          - condition: state
            entity_id: timer.test_timer
            state: active
        sequence:
          - action: timer.cancel
            metadata: {}
            data: {}
            target:
              entity_id: timer.test_timer
alias: Test_timer_script
description: ""
Step 4: Add UI cards to set timer duration ans start/stop it.
I recommend you install the custom timer-bar-card to create cards with an ongoing status of yourtimer as displayed in the picture below.

Install the Timer Bar Card
- Navigate to HACS (Home Assistant Community Store) → Frontend.
- Search for timer-bar-card and click Install.
- Once installed, you may need to restart Home Assistant.
Add the Timer Bar Card to Your Dashboard
Now that the card is installed, you can add it to your Timer Card.
- Go to your Dashboard → Edit Dashboard → Add Card.
- Select Manual Card and add the following YAML configuration to show your irrigation timer:
type: custom:timer-bar-card
entities:
  - entity: timer.test_timer
    name: Test
    icon: mdi:water-circle
    show_icon: true
    state_color: true
    tap_action:
      action: call-service
      service: script.test_timer_script
📌 Explanation:
- entity: timer.test_timer – your timer name
- name: Test – your card name
- icon: mdi:water-circle – choose an icon
- tap_action:
action: call-service – use “call-service” function when card is tapped
service: script.test_timer_script – your script name
Install the Mushroom cards set
- Navigate to HACS (Home Assistant Community Store) → Frontend.
- Search for Mushroom and click Install.
- Once installed, you may need to restart Home Assistant.
Add the Timer Duration Card to Your Dashboard
Now that the card is installed, you can add it to your Timer Card.
- Go to your Dashboard → Edit Dashboard → Add Card.
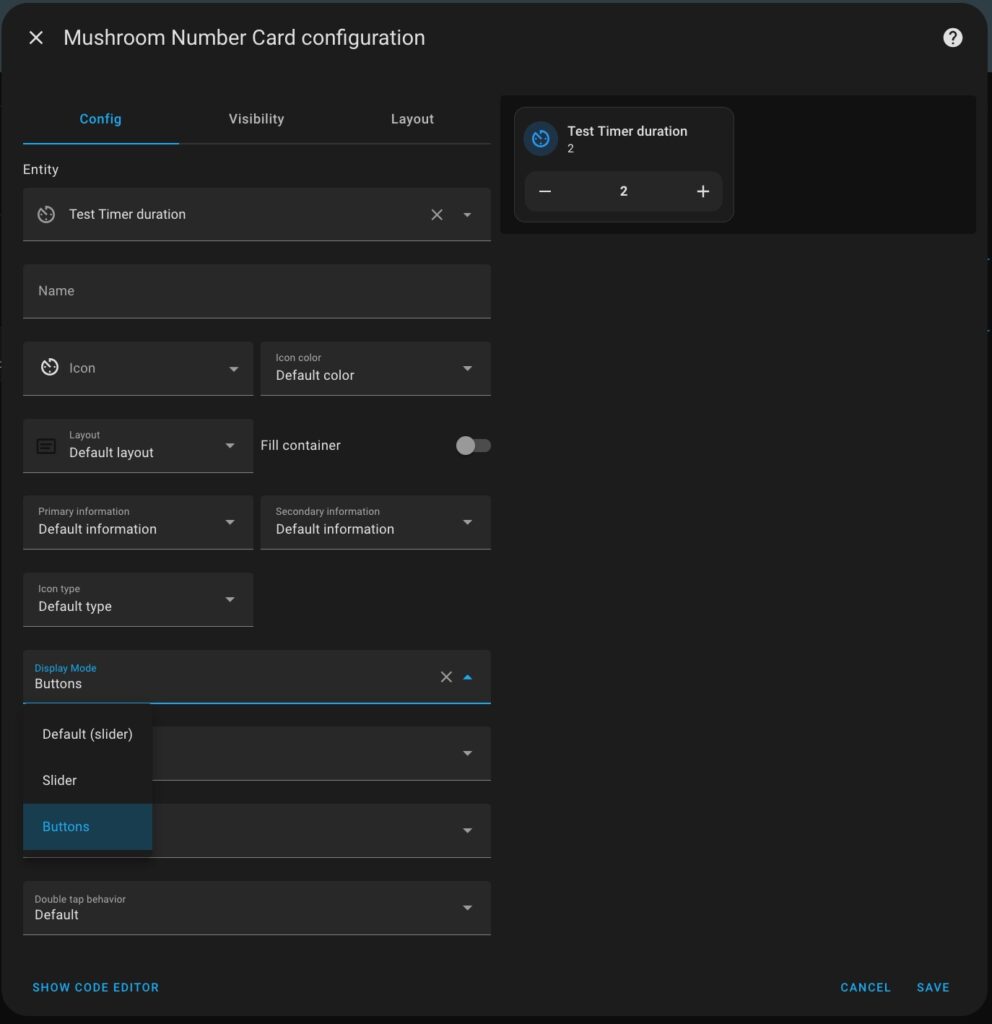
- Select Mushrum Number Card.
- Select your Number Helper for Timer duration.
- Adjust any other setting according to your preferences e. g. you can choose “Buttons” or “Slider” Display mode.
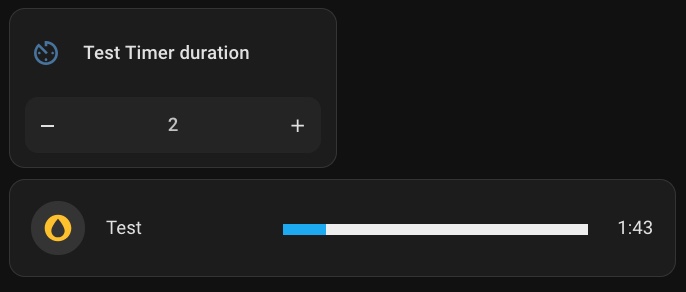
As a result your Number Helper Card should look like illustrated on the picture below:
📌 Final Thoughts