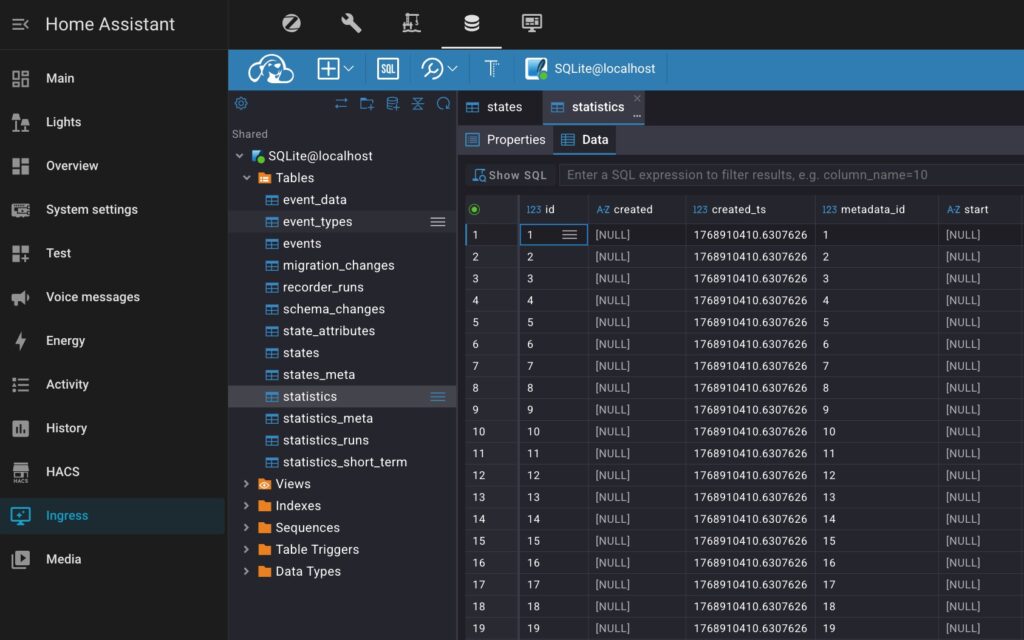
Adding CloudBeaver to your Home Assistant Docker setup as a side panel is a total game-changer for anyone who wants to truly “see” what’s happening under the hood of their smart home. While Home Assistant handles your daily automations beautifully, its underlying database is often a mystery; by bringing a professional SQL editor like CloudBeaver into your side panel, you turn that mystery into a powerful tool for troubleshooting bloated logs or exploring years of sensor history without ever leaving your dashboard. It’s about moving away from clunky external tools and creating a seamless, secure workspace where you can optimize your database, fix minor errors, and gain deep insights into your home’s data with just a single click.
| Feature | CloudBeaver (Enterprise-Grade) | SQLite Web (Lightweight) |
| Interface | Full IDE experience with tabs and advanced data grids | Minimalist, single-page web form |
| SQL Features | Syntax highlighting, auto-complete, and query history | Basic text box for manual SQL entry |
| Visualization | Built-in charts and data grouping tools | Raw table views only |
| Connectivity | Supports SQLite, MariaDB, PostgreSQL, and more | Strictly SQLite only |
| Security | Role-based access and robust session management | Simple password protection (or none) |
| Setup Effort | Requires Root URI and Host configuration | Didn’t find a way to add it to HA as a side panel |
| Best For | Power users, developers, and complex data forensics | Quick, occasional checks of simple tables |
Why Not SQLite-web
I originally wanted a quick way to peek at my Home Assistant database, so I grabbed SQLite-web thinking it would be an easy, lightweight fix. Fast forward two days later: I was still banging my head against the wall trying to get it to play nice with the HACS Ingress side panel. Since I run an Nginx reverse proxy, the standard HA iframe dashboard just wasn’t an option for me—it was basically a ‘broken-on-arrival’ situation. After losing 48 hours to configuration hell, I finally threw in the towel and went looking for a real solution. That’s how I found CloudBeaver.
Prerequisites
An existing Home Assistant Docker installation.
- Installed HACS
Docker Compose (recommended for managing the stack).
Docker compose config
CloudBeaver config
First, let’s create the necessary directories. Feel free to adjust these paths based on your personal preferences:
sudo mkdir -p /opt/HA/cloudbeaver/workspace⚠️ Explanation:
I placed my HA stack in “/opt/HA” folder, choose a target folder according to your prefferences.
Now, add CloudBeaver to your docker-compose.yml config:
cloudbeaver:
    container_name: cloudbeaver
    image: dbeaver/cloudbeaver:latest
    restart: unless-stopped
    ports:
      - "8978:8978"
    volumes:
      - /opt/HA/cloudbeaver/workspace:/opt/cloudbeaver/workspace
      # Mount your HA config folder so CloudBeaver can access the DB file
      - /opt/HA/homeassistant/home-assistant_v2.db:/opt/cloudbeaver/workspace/home-assistant_v2.db:ro
    environment:
      # This MUST match the 'slug' we define in Home Assistant
      - CLOUDBEAVER_ROOT_URI=/api/ingress/cloudbeaver
    labels:
      - updates2mqtt.picture=https://dbeaver.com/wp-content/themes/utouch/img/megamenu/cloud_beaver.svg
      - updates2mqtt.name="CloudBeaver Update"
      - updates2mqtt.compose_path=/opt/HA/docker-compose.yml
    hostname: cloudbeaver
    networks:
     home_assistant:
       aliases:
         - cloudbeaver
       ipv4_address: 172.20.0.9
⚠️ Explanation:
- hostname & aliases:
By setting a hostname and an alias ofcloudbeaverwithin thehome_assistantnetwork, you ensure that any other container on that network can reach the cloudbeaver using that specific name, regardless of what the container itself is named. - Static IP Allocation: The
ipv4_address: 172.20.0.9provides a “hardcoded” anchor. In complex setups, this prevents connection drops that can occur if the Docker engine reassigns internal IPs after a system reboot. - volumes: Maps your host folder for CloudBeaver’s internal data and links your Home Assistant database. For peace of mind, always mount the HA database with read-only access to ensure your smart home data stays safe and protected from accidental changes.
- labels are needed if you use updates2mqtt to your Docker stack updateable from HA UI:
- updates2mqtt.name: Overrides the default container name in the UI, displaying “CloudBeaver Update” instead of a generic ID.
- updates2mqtt.compose_path: This allows the system to know exactly which file to call when you trigger a remote update.
- updates2mqtt.picture: Provides a URL to the CloudBeaver logo, which
updates2mqttcan pass to Home Assistant to populate the entity picture of the update sensor. As usual, I use a favicon from an official web-site.
- CLOUDBEAVER_ROOT_URI to make CloudBeaver accessible with HACS Ingress integration. The path MUST exactly correspond to the Ingress config.
Home Assistant config
Now adjust your HA docker config:
home_assistant:
    container_name: ha
    image: "ghcr.io/home-assistant/home-assistant:stable"
    restart: unless-stopped
    hostname: ha
    depends_on:
      - zigbee2mqtt
    volumes:
      - /opt/HA/homeassistant:/config
      - /etc/localtime:/etc/localtime:ro
      - /run/dbus:/run/dbus:ro
    privileged: true
    network_mode: host
    extra_hosts:
      - "cloudbeaver:172.20.0.9"
    labels:
      - updates2mqtt.picture=https://www.home-assistant.io/images/favicon.ico
      - updates2mqtt.name="HA Update"
      - updates2mqtt.compose_path=/opt/HA/docker-compose.yml

networks:
  home_assistant:
    driver: bridge
    enable_ipv6: false
    name: home_assistant
    ipam:
      config:
        - subnet: 172.20.0.0/16
⚠️ Explanation:
Running Home Assistant in a pure Docker environment offers unparalleled control, but it traditionally lacks the “one-click update” convenience found in Home Assistant OS. By combining CloudBeaver, and a strategic Docker Compose layout, you can build a professional-grade smart home stack that notifies you of updates and allows you to trigger them directly from your dashboard.
1. Networking: The Hybrid Approach
Most Docker containers operate on a private bridge network. However, for Home Assistant to “see” devices like smart TVs, Google Cast, or Apple HomeKit, it usually requires network_mode: host. This allows the container to share the host’s IP address and network stack directly.
2. Bridging the Network Gap with extra_hosts
Because the container is in host mode, it loses the ability to use Docker’s internal DNS resolution. It can no longer simply look up “CloudBeaver” to find it. To solve this without using brittle, changing IP addresses, we use the extra_hosts directive.
This acts as a local “hosts file” for the container, mapping your static service IPs back to friendly names (I provided configs to containers described in this article only to avoid overwhelming).
3. Hardware and System Access
To ensure full functionality, two specific volume mappings and a privilege flag are essential:
privileged: true: Grants the container access to USB Zigbee/Z-Wave sticks and Bluetooth radios./run/dbus: Mounted as read-only to allow Home Assistant to communicate with the host’s system bus (critical for Bluetooth and network management)./etc/localtime: Ensures that logs, automations, and the UI all reflect your physical time zone accurately.
Let’s start your updated setup with the following command:
sudo docker compose up -dIngres Config
First of all, install Ingress integration following the instructions.
Now, open your HA configuration.yaml file and add the following config:
ingress:
  tabs:
    work_mode: custom # MUST
    url: /files/ingress/ha-tabs-ingress.js # MUST
    title: Ingress
    icon: mdi:monitor-shimmer
  cloudbeaver:
    parent: tabs
    work_mode: ingress
    ui_mode: toolbar
    title: CloudBeaver
    icon: mdi:database
    url: http://cloudbeaver:8978/api/ingress/cloudbeaver/
    require_admin: true
If you have already configured Ingress, you can apply the changes by navigating to Settings → Developer Tools, YAML tab, and clicking on “Ingress” in “YAML configuration reloading” section.
Otherwise, you have to restart your HA by clicking on Restart in “Check and restart” section, and choosing “Restart Home Assistant”.
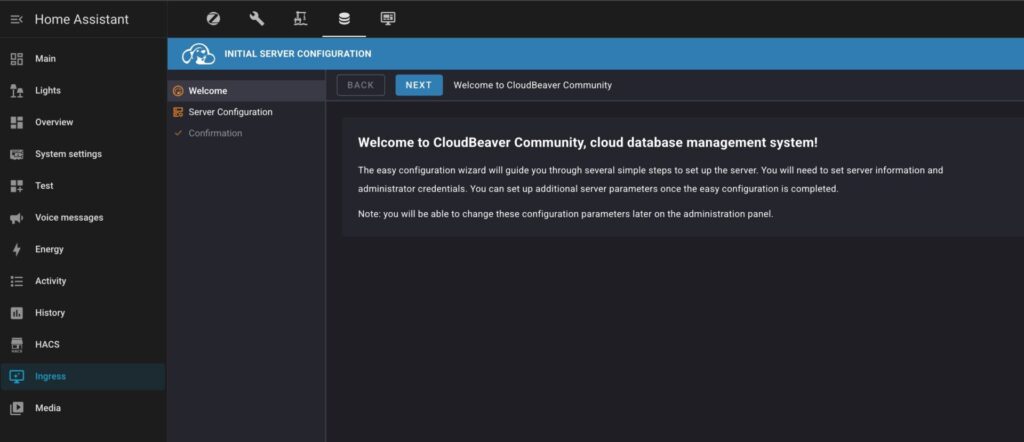
CloudBeaver First Start
After applying your Ingress configuration, you should see the screen of CloudBeaver initial setup:
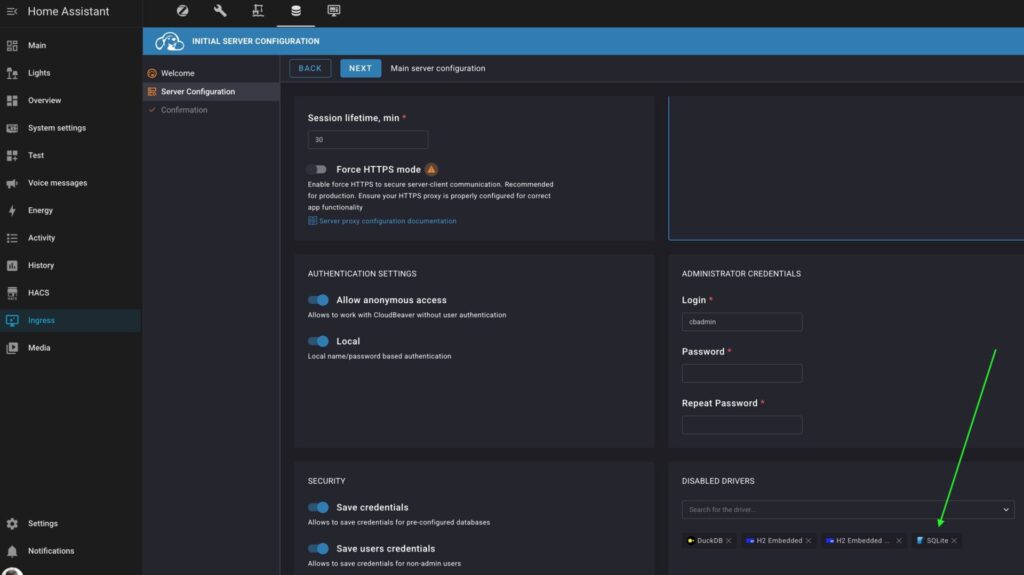
⚠️ WARNING:
In the next step, don’t forget to add your internal and external HA hostnames without and with their ports to the “Allowed Server URLs” section. Otherwise, access to your CloudBeaver can be blocked by its security rules.

On the same screen, don’t forget to exclude SQLite driver from the list of disabled ones.
Now, finalize your setup and create a connection to your SQLite HA database using the right-side path from your CloudBeaver docker compose config:
    volumes:
      - /opt/HA/homeassistant/home-assistant_v2.db:/opt/cloudbeaver/workspace/home-assistant_v2.db:ro
Conclusion
And there you have it—a professional-grade database tool seamlessly integrated into your Home Assistant UI, ready to manage every data base in your home lab.