Introduction
I purchased IKEA devices for making Ambilight in my small living room:
- Two lamps TRADFRI LED 806
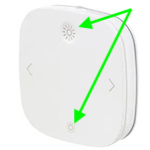
- Remote styrbar
ZigBee2MQTT configuration
First of all, you have to pair IKEA devices with Zigbee2MQTT.
The pairing process was surprisingly tricky for me. According to IKEA manual, a TRADFRI bulb must be switched ON/OFF six times. I tried several times without any results until I perform this action simultaneously with official video guidance.
So, permit join in your Z2M and perform the reset process.
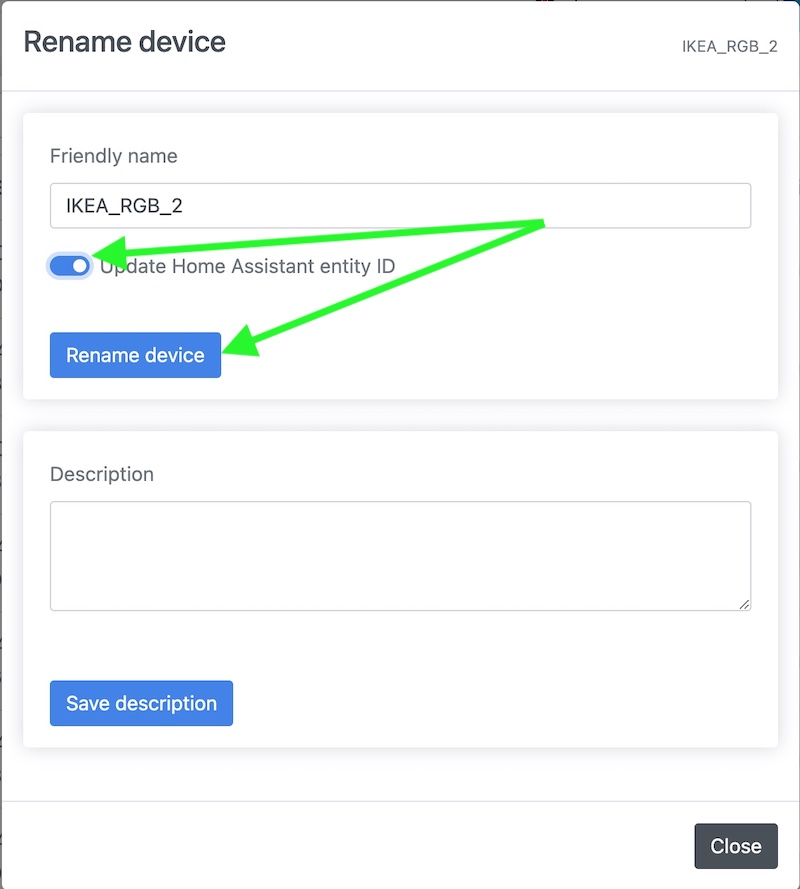
A device appears in Zigbee2MQTT with an unfriendly name. So, rename it:

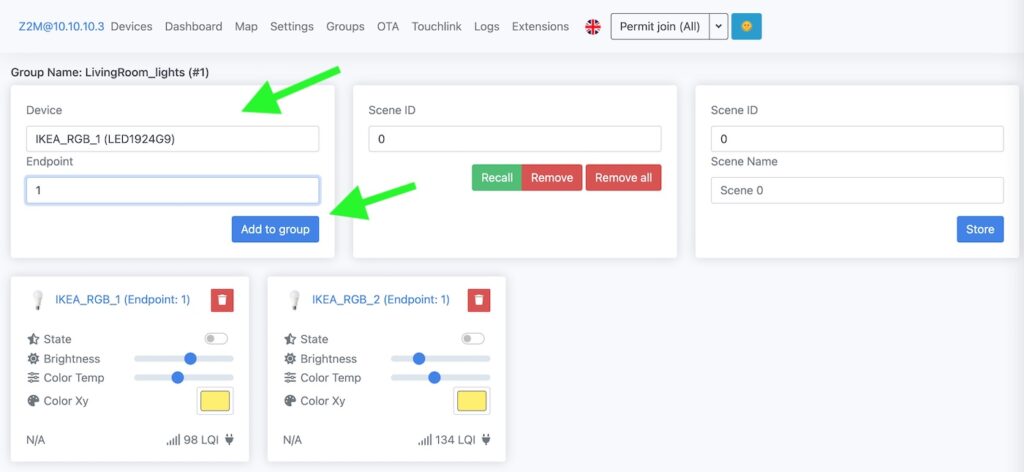
Zigbee2MQTT provides Groups functionality.
Group appears in Home Assistant as additional device and all changes in settings of Group virtual device reflects to group members.
To create group please choose “Groups” menu in Zigbee2MQTT interface, specify group name and click to “Create group” button:

Add devices into created group:
For paring IKEA STYRBAR press the pairing button 4 times within 5 seconds. The red led light must start to blink.
I was faced unexpected spec-effect: StyrBar paired with Zigbee2MQTT but at the same time it was binded to Xiomi Smart Plug and start to switch off/on it without any HA integration.
But my goal is to manage IKEA bulb but not a smart plug.
Finally, I deleted StyrBar from Z2M, created group for smart plugs and moved all of then to the group. As a result remote was paired again with Z2M without any unexpected binding.
Hence, you should have something like this in Zigbee2MQTT:

Home Assistant configuration
Configuration switching ON/OFF
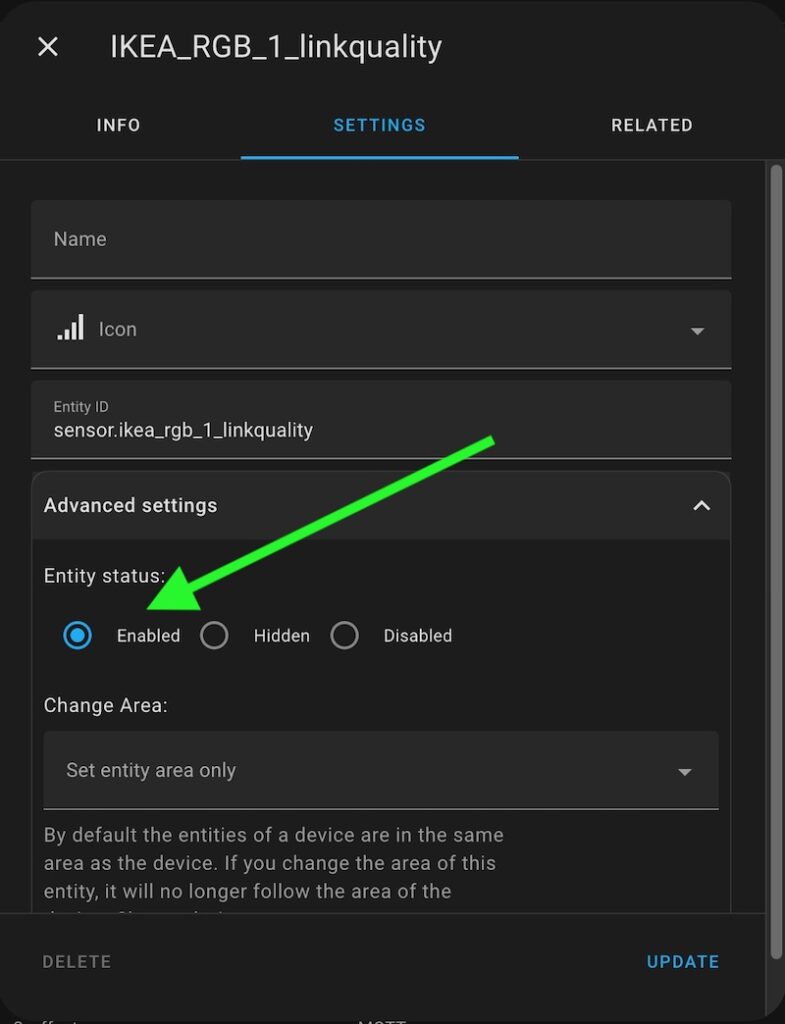
In some reason several parameters of ZigBee devices are disabled in HA by default. So, my recommendation is to enable all of them.
In Home Assistant go to Settings -> Devices and Services -> MQTT -> Entities.

Check is some parameter ara disabled and enable them:
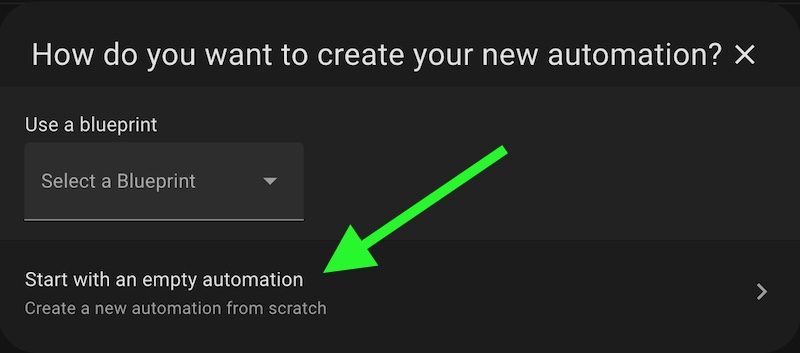
Now you are ready to configure your first automation – switching ON/OFF your bulbs and change brightness with IKEA remote.
Go to Settings -> Automation & Scenes, click CREATE NEW AUTOMATION, and choose start from empty automation:
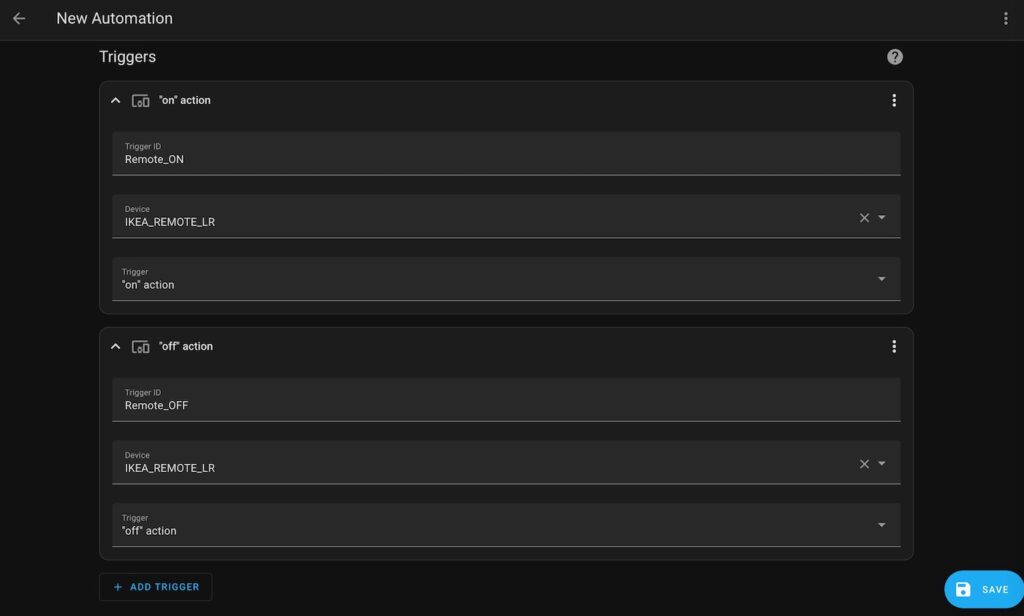
Now you have to configure triggers – catching short click onto brightness buttons:
Add necessary triggers and triggers ID. IDs are needed to add corresponded action for each trigger:
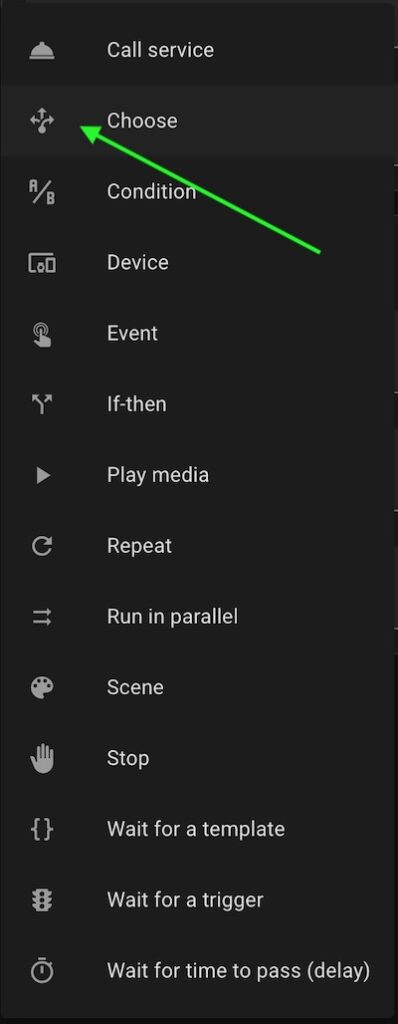
Add action “Choose” to the automation:
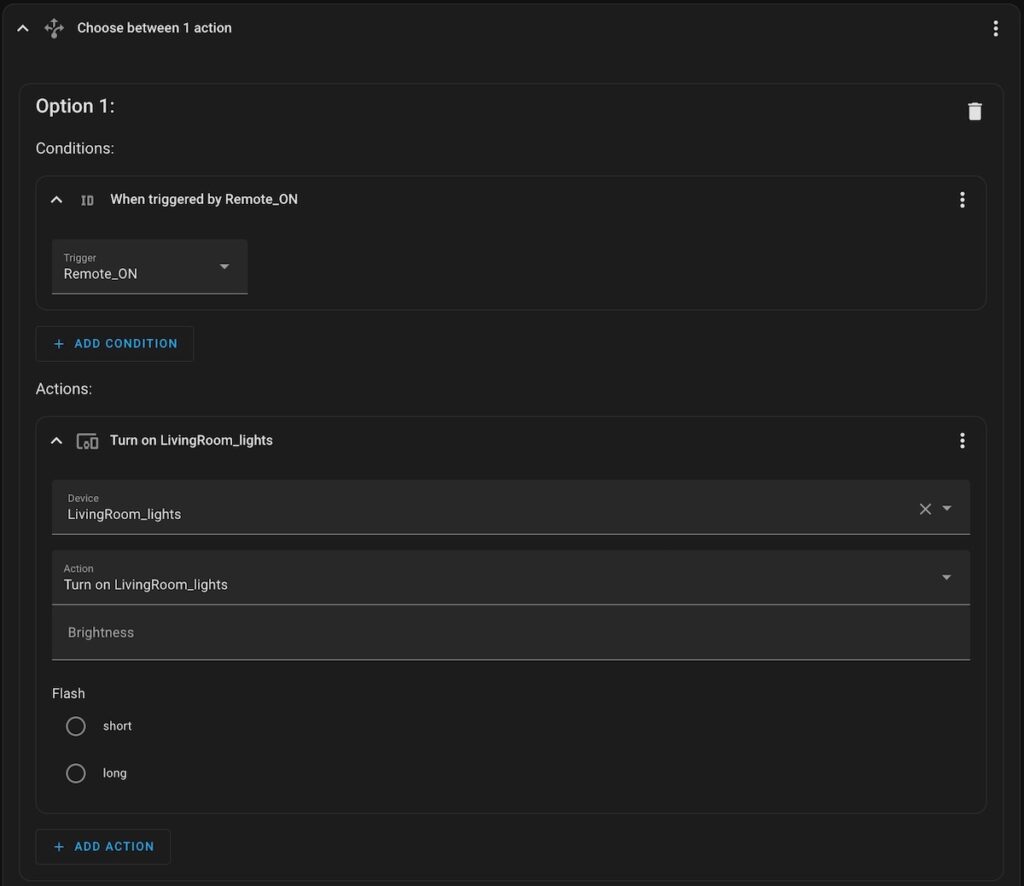
Add first action option for switching ON:
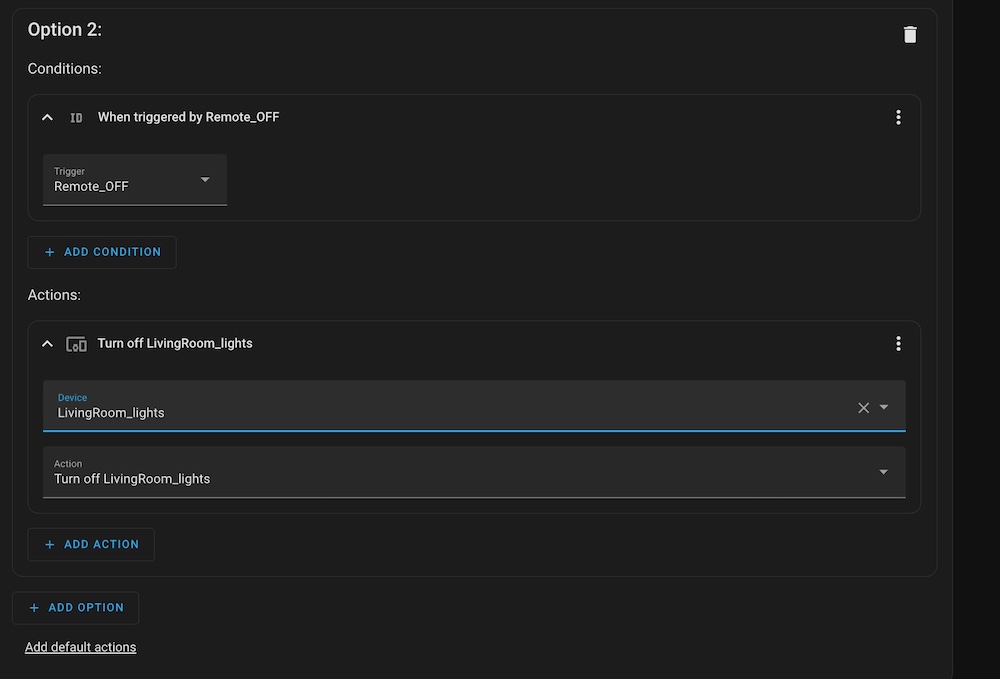
Add second action option for switching OFF and save your automation:
Now you can switch ON/OFF your bulbs simultaneously with the remote.
Brightness change you can add into the same automation by adding to more triggers:
- “brightness_move_down”
- “brightness_move_up”
And two corresponded actions for the bulbs group:
- Decrease LivingRoom_lights brightnes
- Increase LivingRoom_lights brightness
Configure changing mode of bulbs
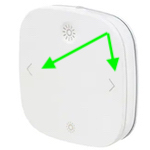
Mode changing is a tad tricky because of the only two buttons on the remote for this action “left” and “right”.
From my point of view the best approach is creation a bunch of scenes and switch between them with remote.
So, first of all you should create scenes and configure the possibility to change them. Scene is saved state of added to it devices. Hence, Home Assistant switch the devices into configured modes when scene is activated.
Go to Settings -> Automation & scenes -> Scenes.
And create necessary scenes with preferred modes of your bulb.
Please see the example of a scene:
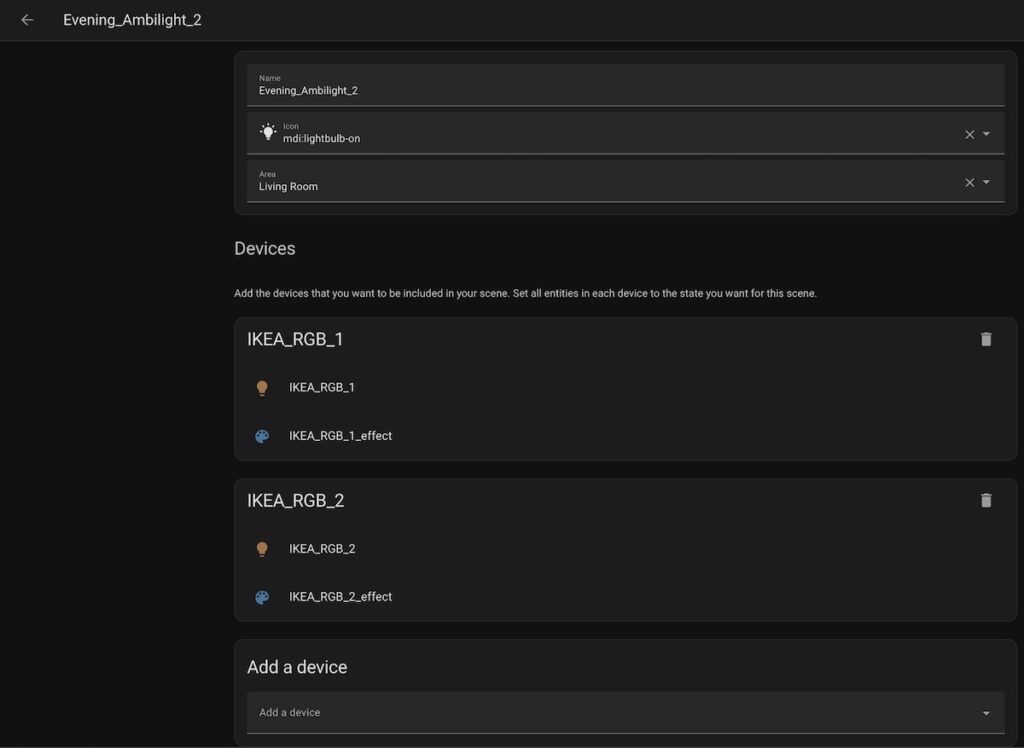
Individual settings of bulbs are used instead of group because I need different brightness for each bulb.
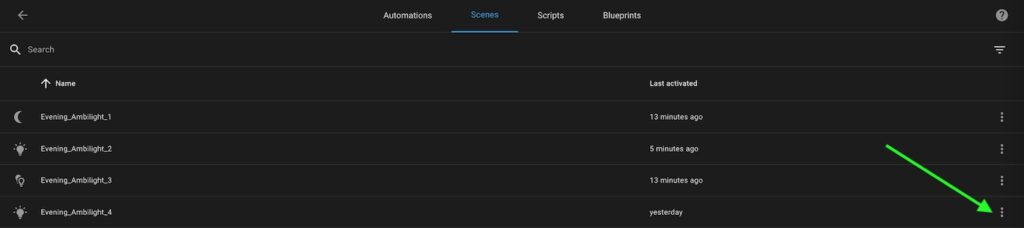
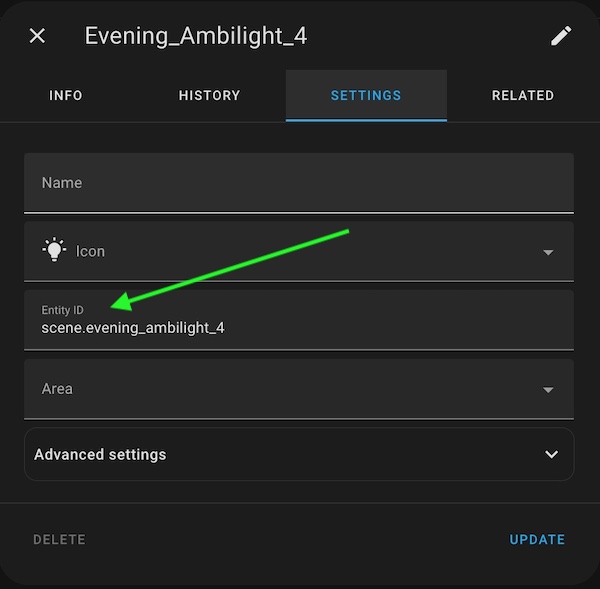
As a result you should have a bunch of scenes. Please check IDs of your scenes because you need them for further steps:
Unfortunately, I didn’t find a direct way to switch between scenes but not choose exact scene in an automation.
Hopefully, Home Assistant provides “choose next/previous” functionalities for “Input select”.
Hence, we need a “Input select” helper to switch between scenes.
Go to Settings -> Devices & Services -> Helpers. Click “CREATE HELPER” and choose “Dropdown”.
Add scenes IDs as options of Dropdown and save it. Your helper should look like this:
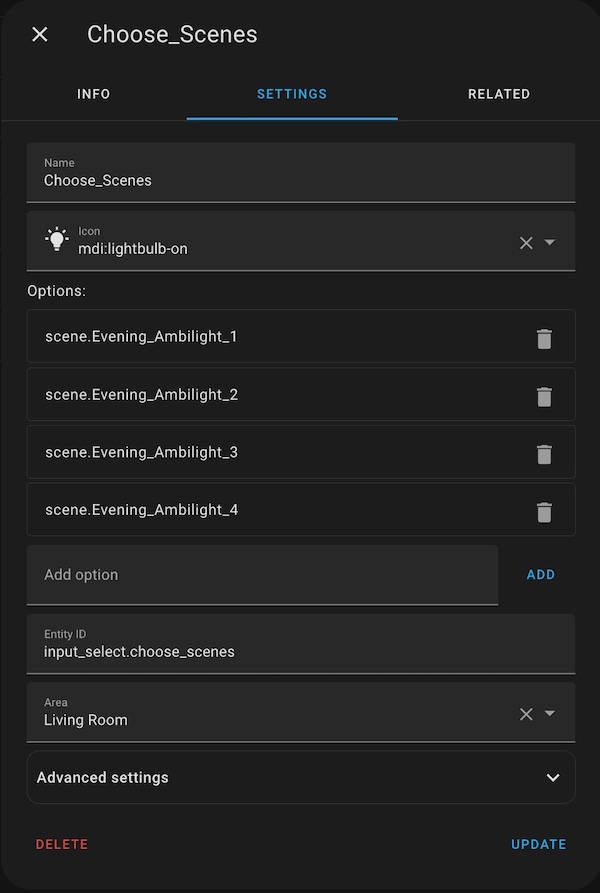
Pay attention to name of the helper! It’s needed for an automation to activate selected scene.
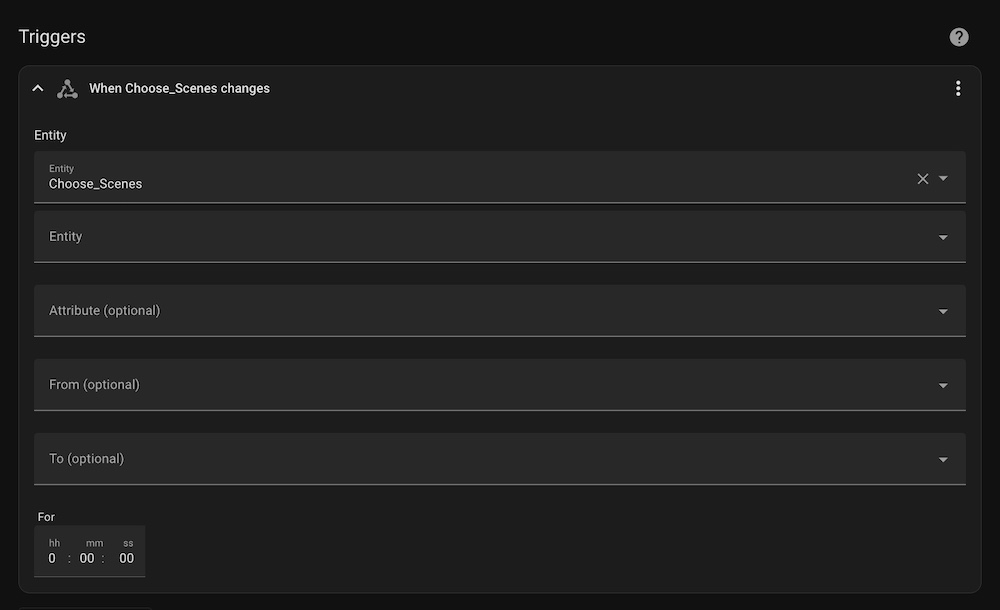
Let’s create an automation.
Go to Settings -> Automations & Scenes and click CREATE AUTOMATION.
Unfortunately, Home Assistant doesn’t have action for scene activation by provided name. So, template based activation is needed:
service: scene.turn_on
target:
  entity_id: "{{states('input_select.choose_scenes')}}"
Add trigger for your helper state’s changing:
Add action for the automation and save it:
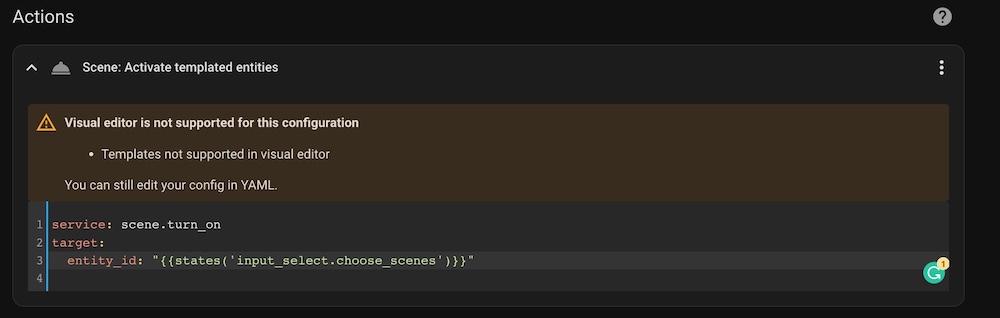
The text version of the template is provided above.
Let’s check our automation with creation a card on Lovelace Overview.
Add Entities card onto your dashboard and try to change your scenes:
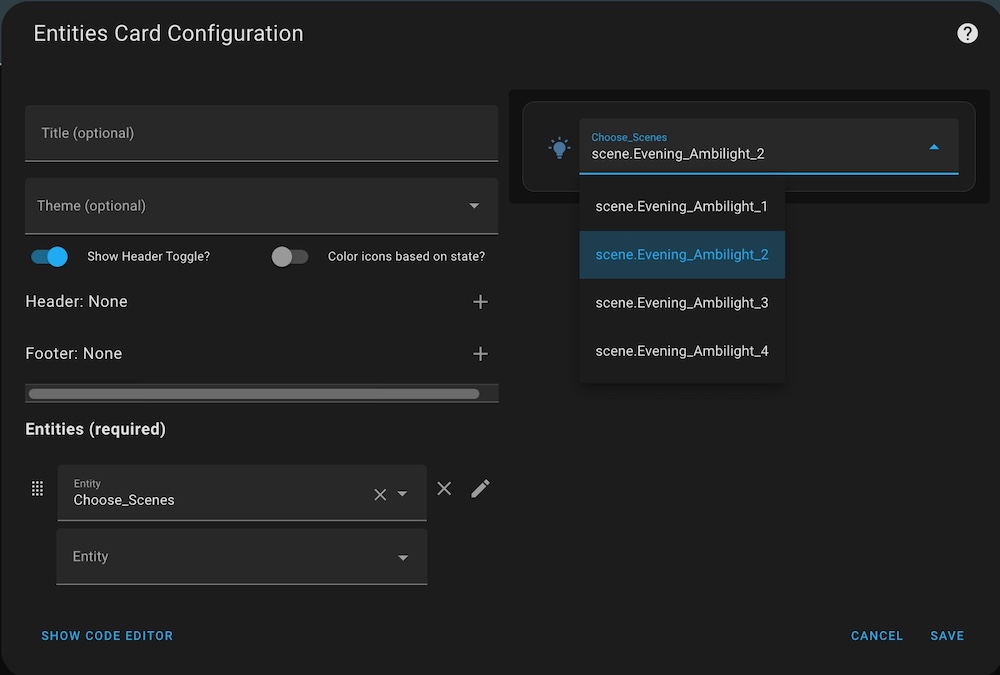
Bulbs have to change mode accordingly to selected scene.
Create automation to activate scenes with IKEA remote
The most suitable way is creation two scripts for left and right buttons of IKEA remote.
Go to Settings -> Automations & Scenes – > Scripts and click ADD SCRIPT:
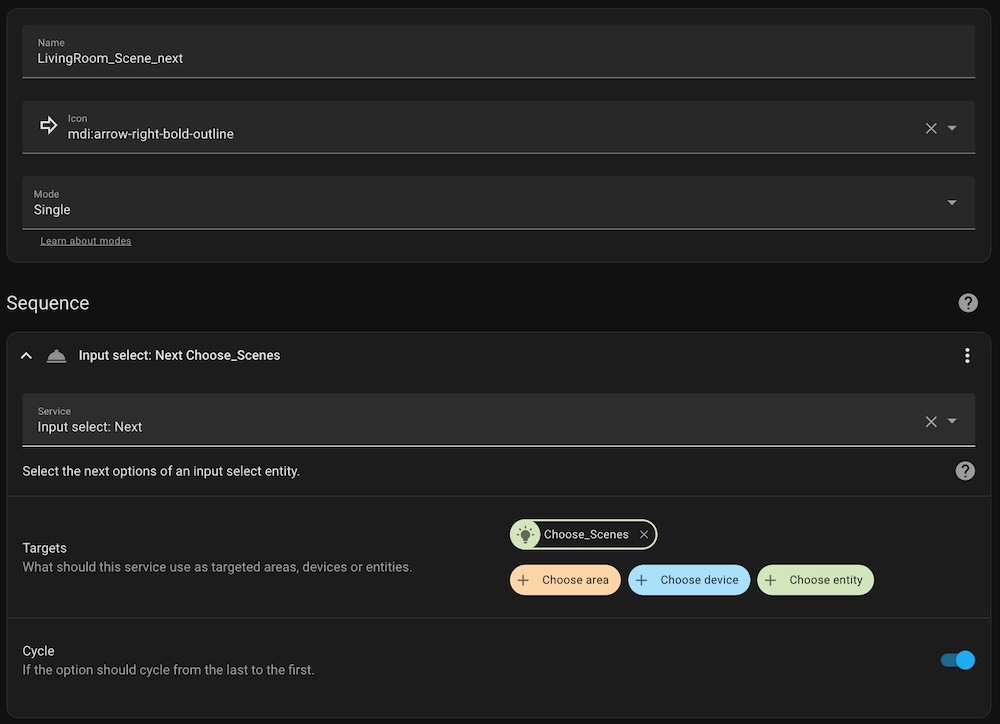
Pay your attention to the “Cycle” option. It’s needed for jumping to first item of your Dropdown helper when last one is reached.
This script is used for right button of IKEA remote.
Try to create the script for left button to select previous item of the Dropdown helper.
You can run your scripts manually and check if it activate a scene with changing active item in the helper.
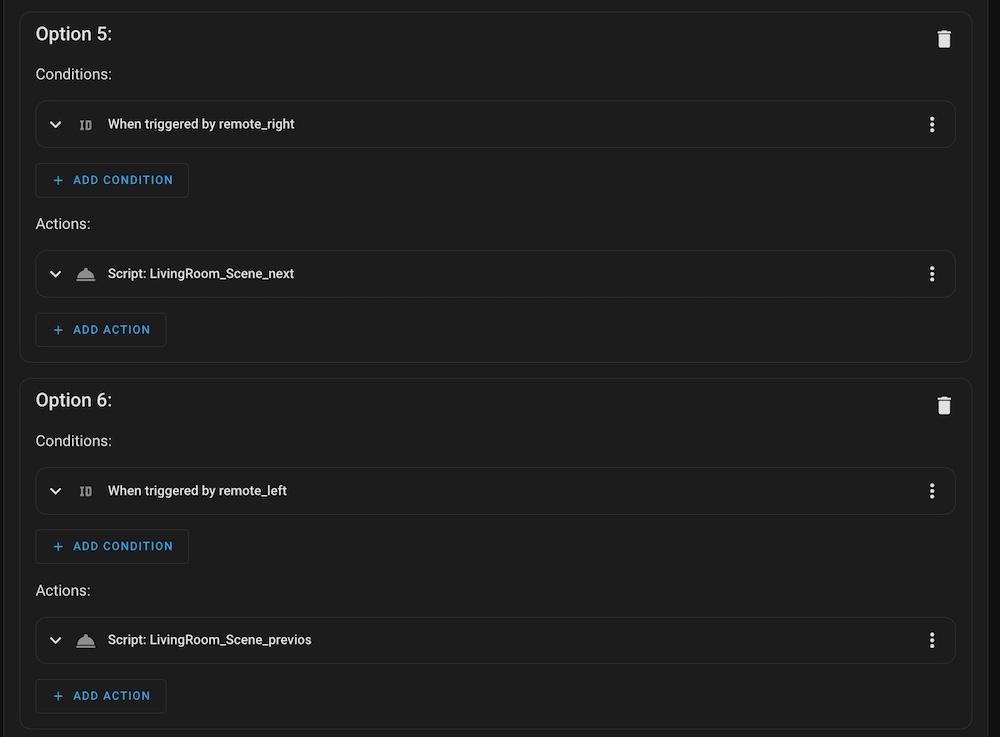
So, open your automation for switching ON/OFF bulbs with IKEA remotes, add triggers for left and right buttons:

Add options with actions for the new triggers:
As a result you should be able to perform following actions with your IKEA remote:
- Switch ON/OF your bulbs.
- Change brightness.
- Switch between scenes.
Don’t forget to add scenes to your helper if you new scenes added.
Please ask any questions in the comments.