After configuring the Home Assistant integration (please find the guidance with the link), I noticed the option to switch the recuperator mode between:
- Balance: allowing two-way air flows.
- Supply_only: bringing in outside air without extracting inside air.
- Exhaust_only: extracting air from the house without bringing in outside air.
This prompted me to consider how to discern the quality of outside air and cease its intake if it’s diminished.
Unfortunately, I couldn’t find inexpensive wireless outside 2.5PPM sensors. However, I discovered the https://aqicn.org resource, which provides an API for accessing live air quality data from the nearest sensor.
Therefore, it’s possible to retrieve data from the resource and adjust the recuperator mode accordingly.
Configure integration with World Air Quality Index (WAQI)
GEtting api key
First of all you need an API key to get data from World Air Quality Index (WAQI) resource which has following advantages:
Accurate data: WAQI provides real-time air quality readings from multiple sources worldwide, ensuring accurate, up-to-date, and comprehensive data.
Easy Accessibility: The information is easily accessible globally, covering thousands of locations across the world, which enables us to comprehend the air quality of any given area quickly.
User-friendly interface: It presents data in an easy-to-understand colour-coded index, allowing everyone to understand current air quality levels and potential health impacts.
Health Recommendations: The index also provides health advice corresponding to the current air quality, which is very helpful for sensitive individuals or for planning outdoor activities.
Comprehensive pollutants: WAQI provides measurement of various pollutants like PM2.5, PM10, O3, CO, SO2, and NO2, that helps to get a detailed overview of air quality.
Historical Data: It also provides historical air quality data, which can be quite helpful for research and trend analysis.
- World Air Quality Index (WAQI) can be integrated with home assistant appliances. For instance, with smart home devices and systems like Google Home or Amazon Alexa, you can set up a command that provides you the WAQI details. Also, platforms such as Home Assistant support WAQI integrations, enabling you to view the air quality index data directly on your automation dashboard. This way, you can monitor and automate your home’s air filter systems based on the air quality index, creating a healthier indoor environment.
So, you should follow a pretty simple registration on the resource Air Quality Open Data Platform: API Token Request Form (aqicn.org)
Please go to the platform and obtain your API key.
Configure Home assistant integration
Hopefully the WAQI integration is added to the standard HA repository, so no additional steps are needed to get it from HACS (custom repository).
More information you can found on Home Assistant official web-site.
Let’s configure the integration.
Please go to HA Settings -> Devises & Services -> Integrations, and click onto “+ ADD INTEGRATION” button on right bottom conner.
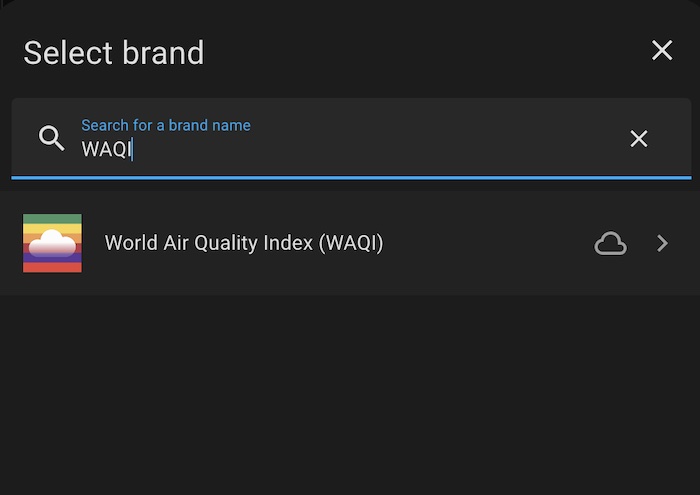
After you should type “WAQI” in the search field of the new window:
Now click onto the integration and enter your API key generated on previous steps.
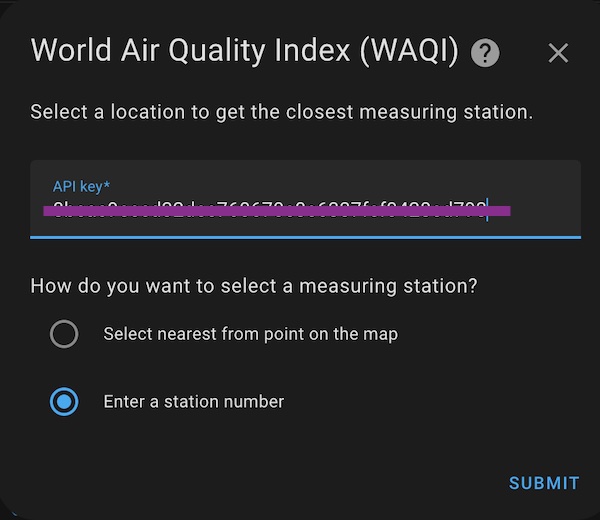
From the available options to determine the nearest measuring station, you have two choices. Regrettably, the “Select on map” option has failed to operate for me. Thus, the most effective alternative is to locate the station using the World’s Air Pollution: Real-time Air Quality Index (waqi.info) resource.
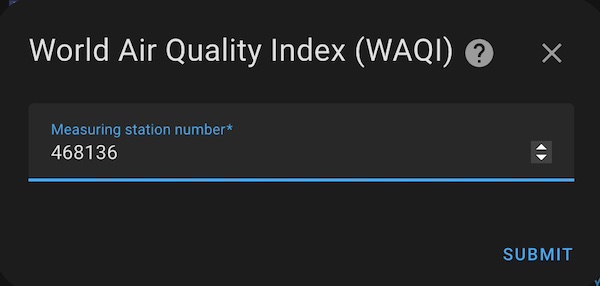
For example purpose I found a station in beautiful city Venice:
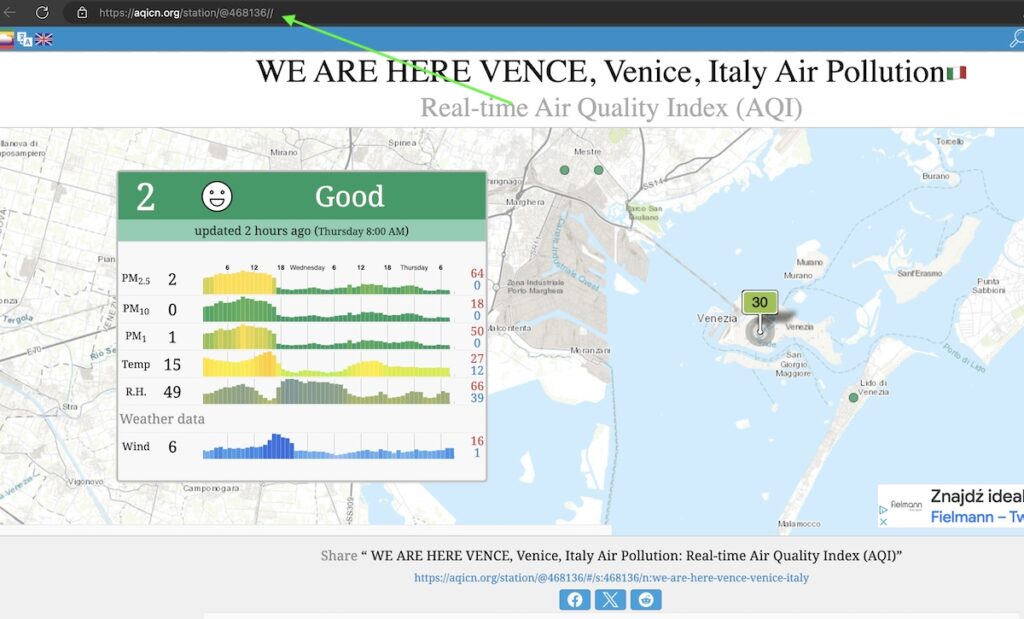
The number of the station is available in URL string after @.
Let’s add it to your config, click submit and define an aria for Home Assistant if you would like to use it.
With those steps complete, your integration should now be set up. To confirm this, go to your ‘Integrations’ section and locate the new integration. Click on it and verify if Home Assistant has started collecting data.
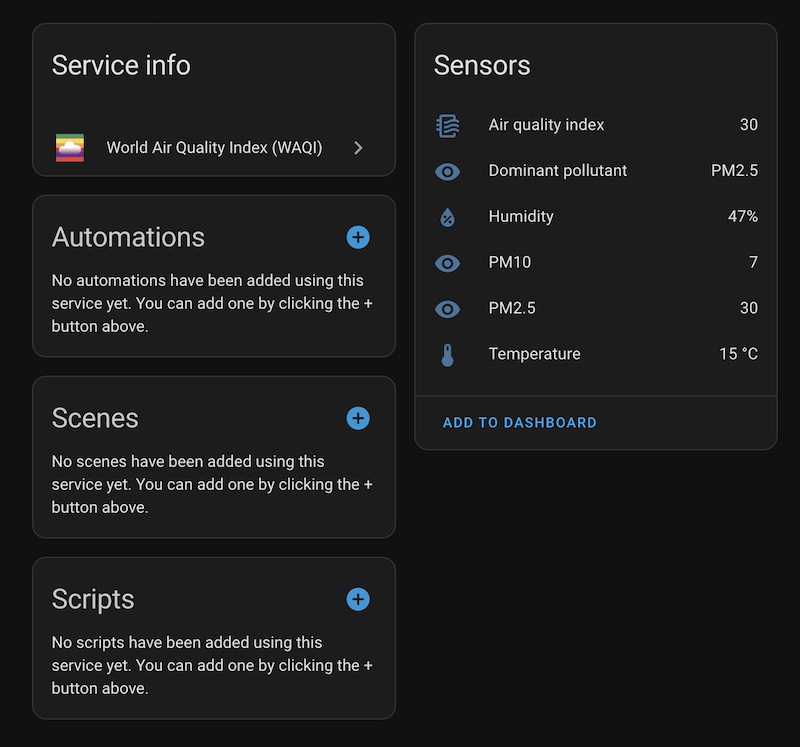
Please note that the number of sensors at a given station varies depending on the specific location. For instance, the station nearest to me only provides data on PM2.5 and PM10 air pollution, without offering temperature or humidity information. This factor depends entirely on the unique setup and capabilities of each individual station.
Now you can add those information on your dashboard if you want.
Configure automation to change mode of you recuperator
You now have access to outside air quality measurements which can help you determine a safe level of pollution, if any, to allow into your home.
To create an automation for this, navigate to “Settings”, then select “Automations & Scenes”. In the lower right corner, click the “+ CREATE AUTOMATION” button, , then select “Create a new automation”.
triggers creation
To begin, set up a trigger for your automation. Click the “+ ADD TRIGGER” button. Here, you will enter “State” in the search box to find and select the “Numeric state” trigger:
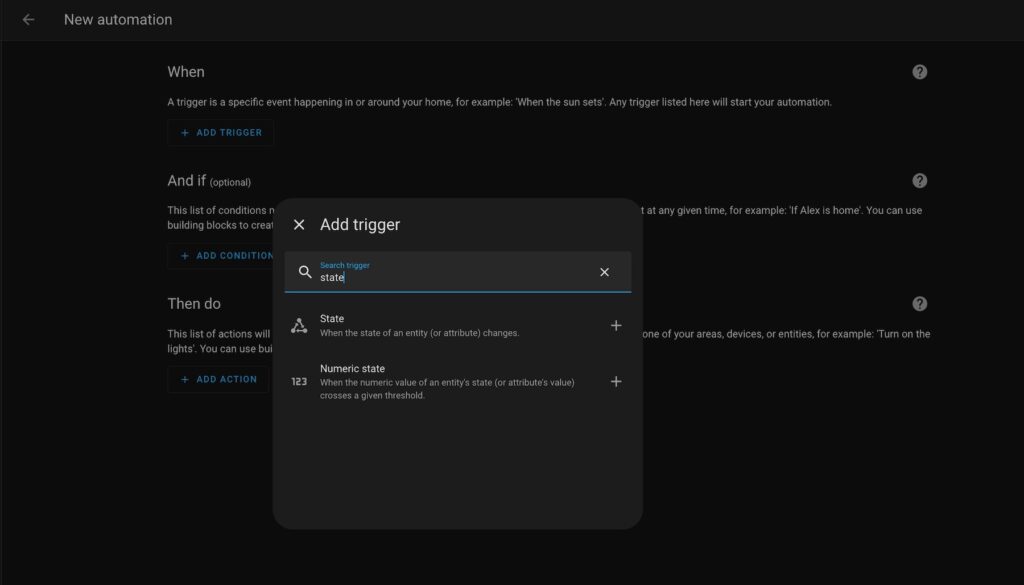
We’ll begin by setting a trigger for the “low pollution” state, indicating that the outdoor air quality is suitable to bring into your home.
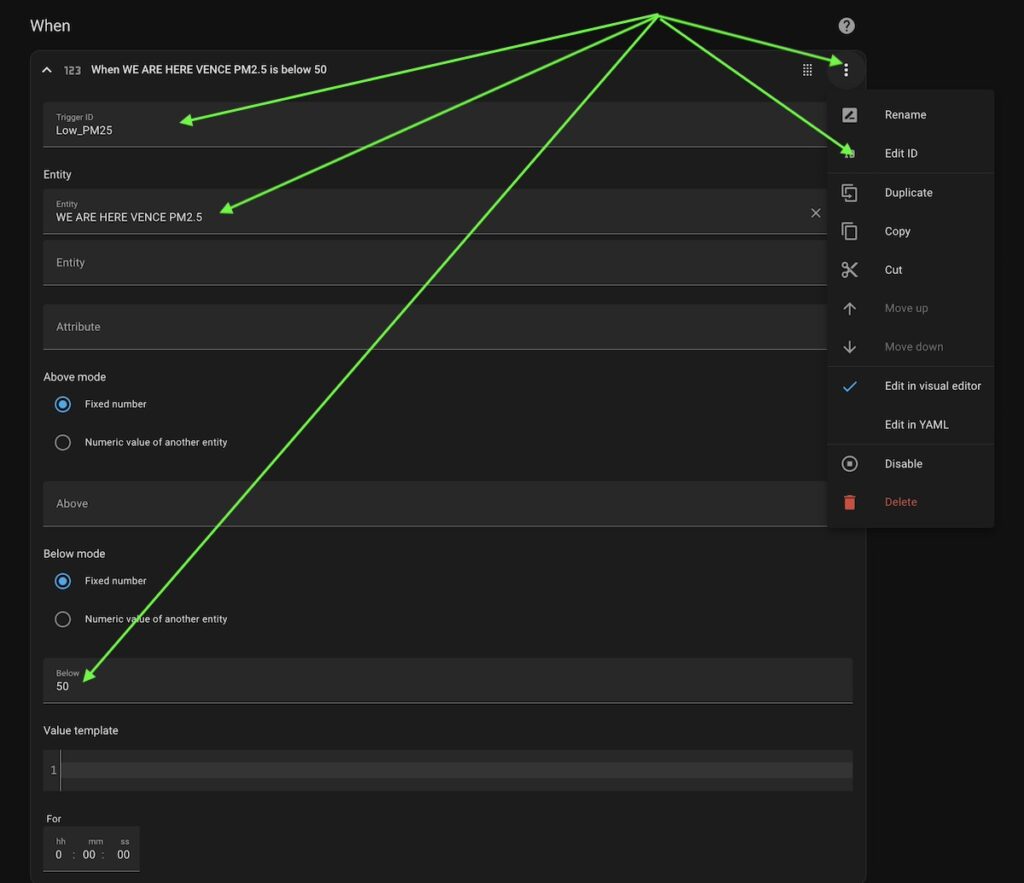
In my opinion, an acceptable PM2.5 level is below 50. However, you’re free to specify a level that suits your specific needs.
To identify this trigger for easy reference in the future, please click on the “triple-dot” menu and select “Edit ID”. This step will allow you to assign a unique name to this trigger within the automation.
The next step is to create a “Numeric state” trigger for poor air quality conditions. This trigger will prevent outside air from being pulled into your home when the pollution level rises above your specified limit.
So, the “+ ADD TRIGGER” button again and choose “Numeric state” trigger.
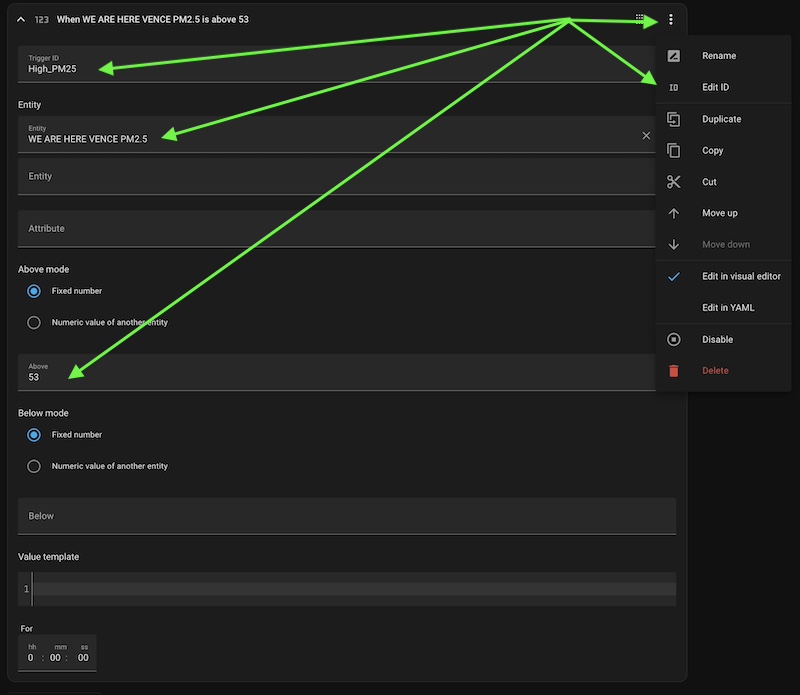
Please take note of the distinct values for good air quality “50” and poor air quality “53” specified in the triggers.
Putting in place this slight buffer prevents rapid and frequent changes to the recuperator modes, which could otherwise potentially harm your unit. Establishing this safety margin helps to ensure the longevity and proper functionality of your system.
actions creation
Now that we have triggers set for changes in air quality, it’s time to create corresponding actions to adjust the recuperator modes.
Let’s start with the action to shift the recuperator into “balanced” mode. This setting allows for both the intake of outside air and the extraction of inside air.
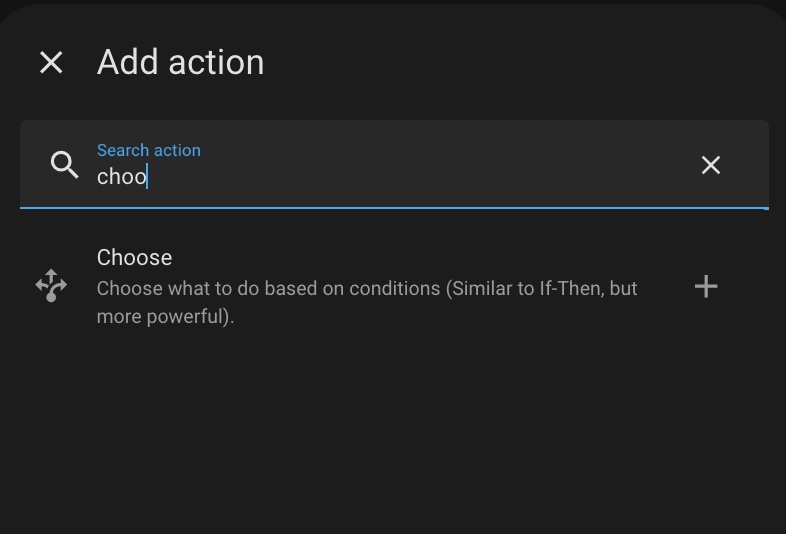
Click on “ADD ACTION” and type “choose” into the search box. Select the matching action from the list and click on it:
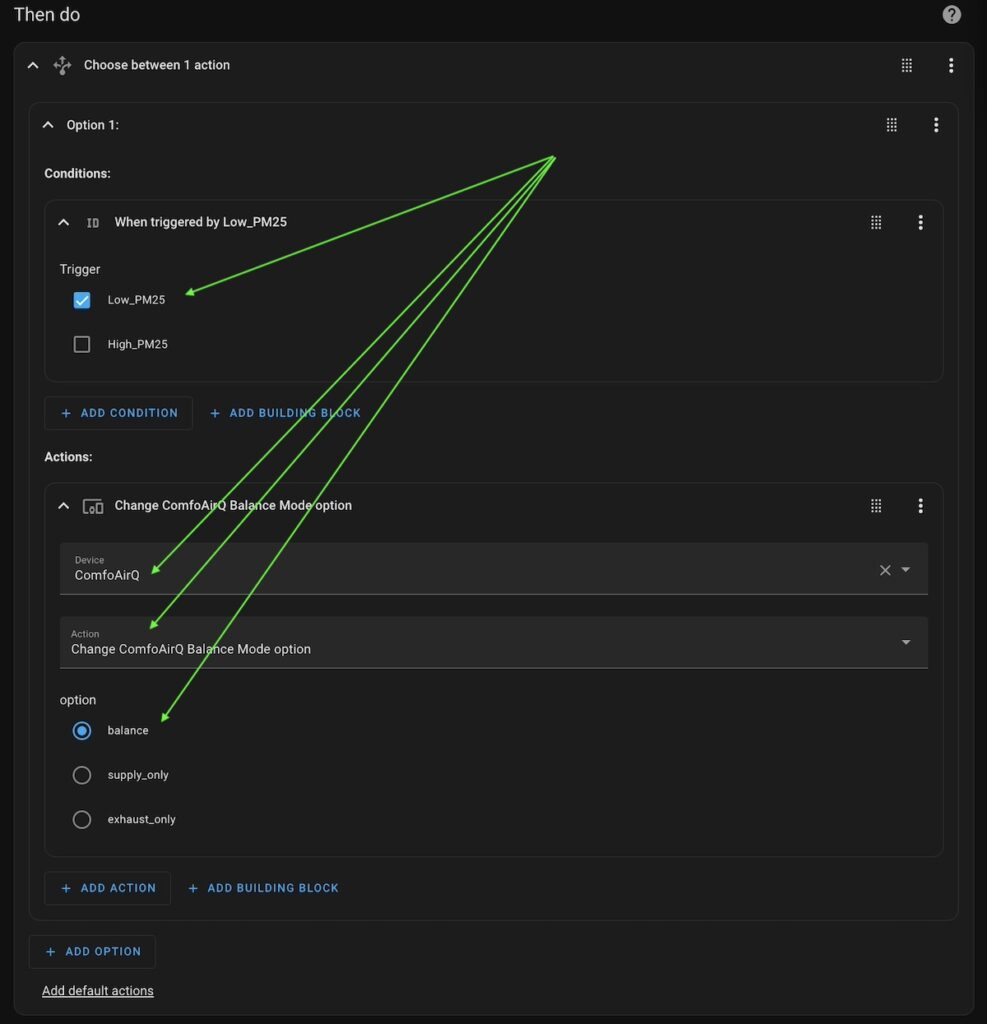
Now we can configure an action for each trigger. Click onto “Option 1”:
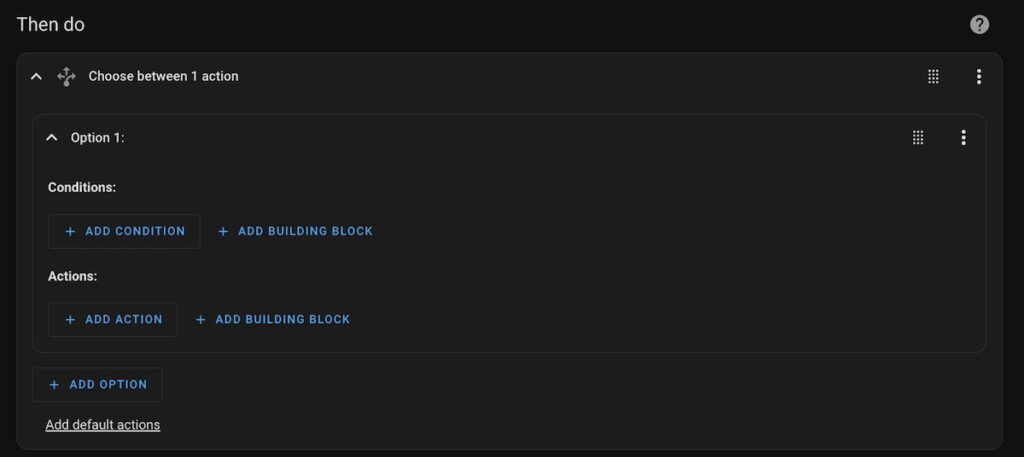
Then on “+ ADD CONDITION” button and choose “Triggered by” condition. After choose “Low_PM2.5” trigger name.
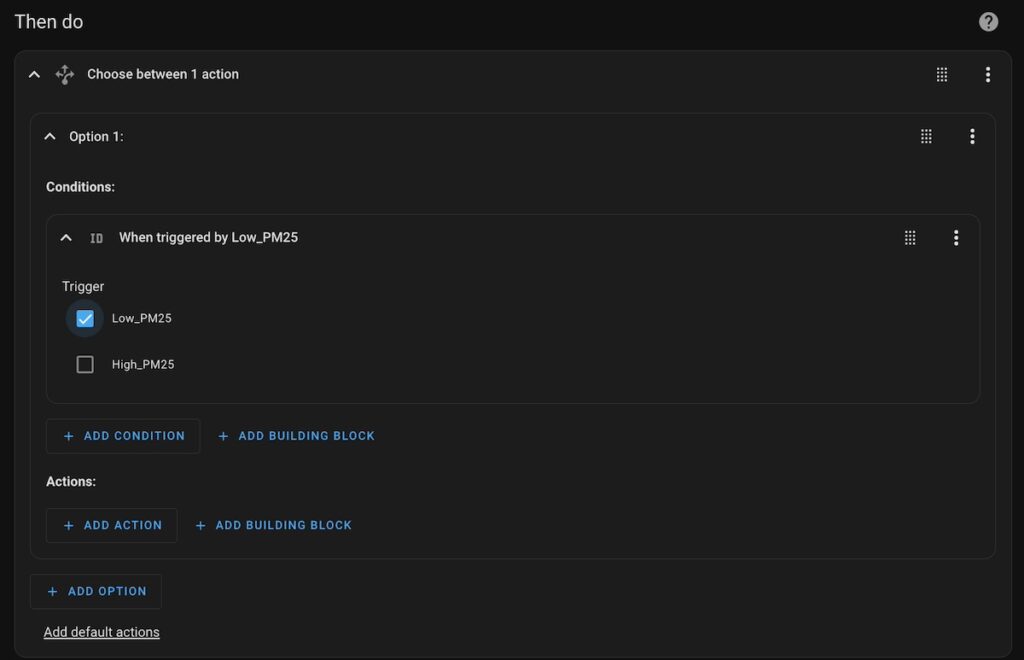
Next, click the “+ ADD ACTION” button and select the “Device action” condition. Then, find and select the name of your recuperator from the device list and choose the “Change ComfoAirQ Balance Mode option” action.
Lastly, select the “Balance” option. This completes the setting of your recuperator’s actions in response to changes in air quality.
Actually, an additional configuration is required to switch the recuperation mode in case of poor air quality.
Click the “+ ADD OPTION” button, and repeat the previous steps with slightly modified settings to establish the correct condition and action for this scenario.
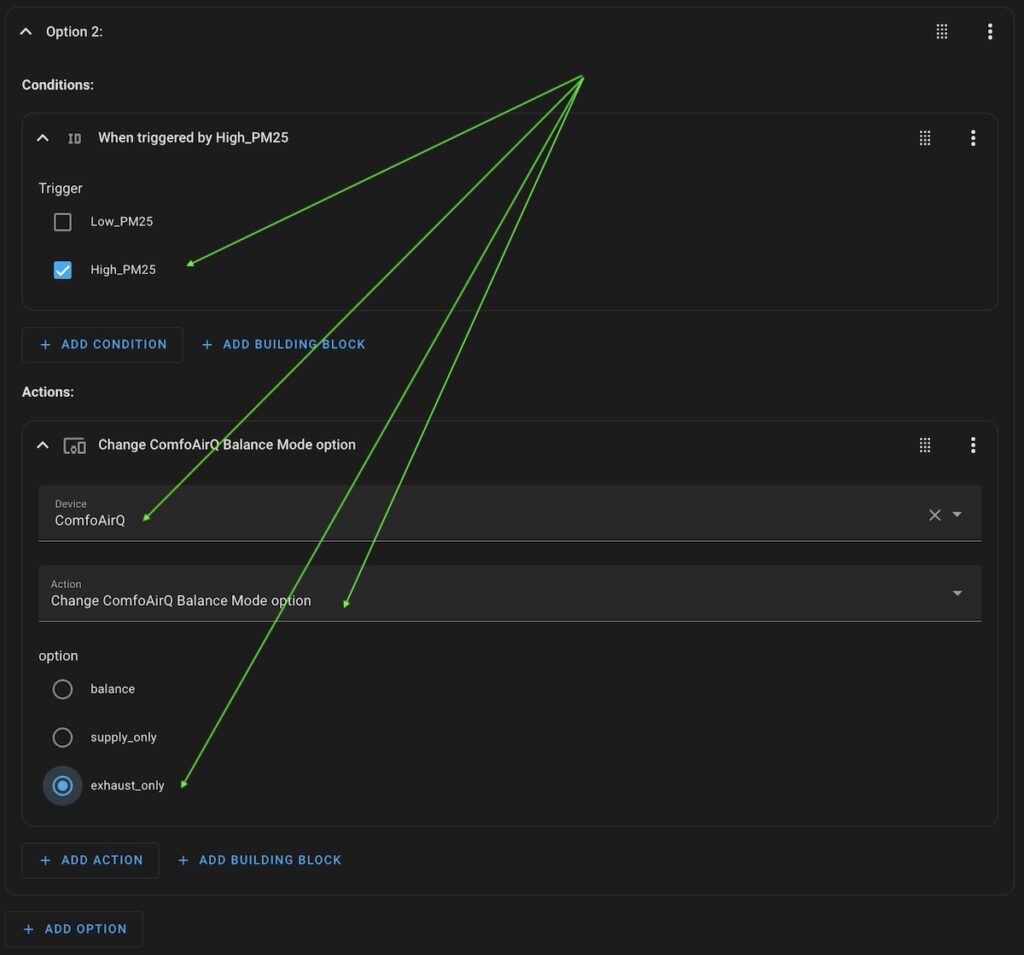
Please compare your configuration with the provided screenshot to ensure accuracy. Once done, click the “SAVE” button located at the bottom right corner and assign a name to your automation.
Congratulations! Your home is now set to only allow air of good quality inside. Well done on enhancing the air quality of your living environment!