why zigbee2mqtt is needed
A lot of add-ons were developed for different gateways. But, they mostly work with a manufactured provided cloud solution with the following limitations:
- Your integrations work if a manufacturer’s cloud is accessible.
- You can connect devices supported by a manufacturer only.
The open-source solution ZigBee2MQTT supports more than 2400 devices. So, you can combine devices from different manufacturers in your HA.
why xiomi gateway is chosen to integrate zigbee devices with Home Assistant
ZigBee devices can be connected with USB dongle or ZigBee-WiFi gateway. The second way is more suitable from my point of view because of two advantages:
- ZigBee-WiFi gateway can be placed anywhere in your hose for a better connection with ZigBee devices. USB dongle must be connected to your home server only.
- Such gateways are pretty well designed to place them in your interior.
A lot of manufacturers provide their own ZigBee gateways, but they can be connected to thier own clouds only.
Some of the gateways can’t be adopted for HA, but some can be re-flashed with open-source firmware for HA integration.
Hopefully, Xiaomi gateways have a way to enable telnet and allow HA integration as a result.
security breach in the approach for integration HA with Xiaomi GW.
I’d like to draw your attention to a potential security breach because of opened telnet in Xiaomi GW.
Unfortunately, there is no possibility to set up a password for telnet access in Xiaomi GW.
So, everybody can access it if got access to your home network.
From my point of view, it’s not a problem, because the home network must be well secured because of a lot of personal information on home devices.
BTW, you should be aware of this issue and can continue with this instruction at your own risk.
Open telnet in Xiaomi GW.
Unfortunately, not all Xiaomi gateways and firmware can be integrated with HA.
You can find the list of supported devices and firmwares on the page of HA addon “Xiaomi Gateway 3“.
So, during the following installation of your Xiaomi GW be careful and DO NOT update to the last firmware which is NOT supported with the addon!
Configure Xiaomi GW with Mi Home application
Setting up Xiaomi GW with MiHome is a pretty straightforward process. So, I would not spend time for guidance.
Please be aware that all features are available for “China mainland” region only. Hence, choose this region for your MiHome profile.
Get device token of your Xiaomi GW
I found a bunch of methods to obtain the token:
- With hacked Mi Home mobile application
- With PHP and java applications.
- With Xiaomi Cloud Tokens Extractor.
The last one is the easiest and most straightforward.
I used my Raspberry PI for it because I installed HA onto RPI OS and keep the full Linux functionality of my Raspberry.
First of all you need install Python-pip:
apt-get install python3-pip
Install and run Xiaomi Cloud Tokens Extractor:
wget https://github.com/PiotrMachowski/Xiaomi-cloud-tokens-extractor/releases/latest/download/token_extractor.zip
unzip token_extractor.zip
cd token_extractor

pip3 install -r requirements.txt

python3 token_extractor.py
Now, you have to loggin to Xiaomi cloud with token_extractor and get the token:
python3 token_extractor.py

Username (email or user ID):
your@mail_address.com

Password:
Your_password

Server (one of: cn, de, us, ru, tw, sg, in, i2) Leave empty to check all available:
Here you should choose the region of your MiHome account. I hope you chose “China mainland”. So, input cn in this case.
In case of successful loggon in you Xiomy account, you get following information:
Logging in...
Logged in.

Devices found for server "cn":
   ---------
   NAME:     Mi Smart Home Hub
   ID:       XXXXXXXXX
   MAC:      XX:XX:XX:XX:XX:XX
   IP:       192.168.0.XX
   TOKEN:    XXXXXXXXXXXXXXXXXXXXXXXXXXXXXXX
   MODEL:    lumi.gateway.mgl03
   ---------

Press ENTER to finish
Please be aware that IP of your GW must be used in the configuration of your HA addon.
So, you should configure your router to set up static IP for your GW.
Actually, you have enough information to start configure your HA.
Configure Xiaomi gateway 3 integration for your Home Assistant
Unfortunately, Configure Xiaomi gateway 3 isn’t included in HA integrations.
So, you can follow the article to install HACS which provides the ability to install a lot of community add-ons.
Install Xiaomi Gateway 3 integration
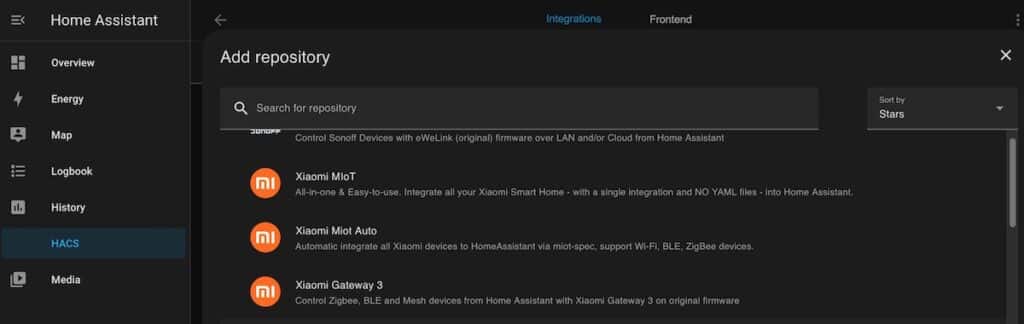
Please choose Xiomi Gateway 3 repository and click “Download” download on the next screen:
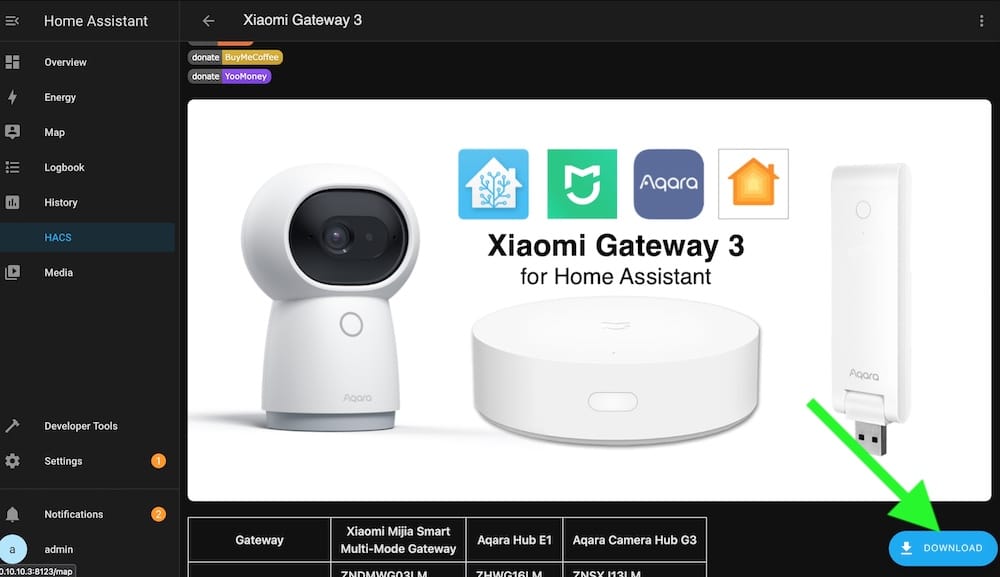
Remember that you need to restart Home Assistant before changes to integrations (custom_components) are applied.
So, restart your HA when the download is completed.
After reboot, you MUST clear the cache and cookies in your browser for your HA site. Otherwise, “Xiaomi Gateway 3” integration will be invisible.
Go to “Settings” -> “Integrations” and press the button “+ ADD INTEGRATION”.
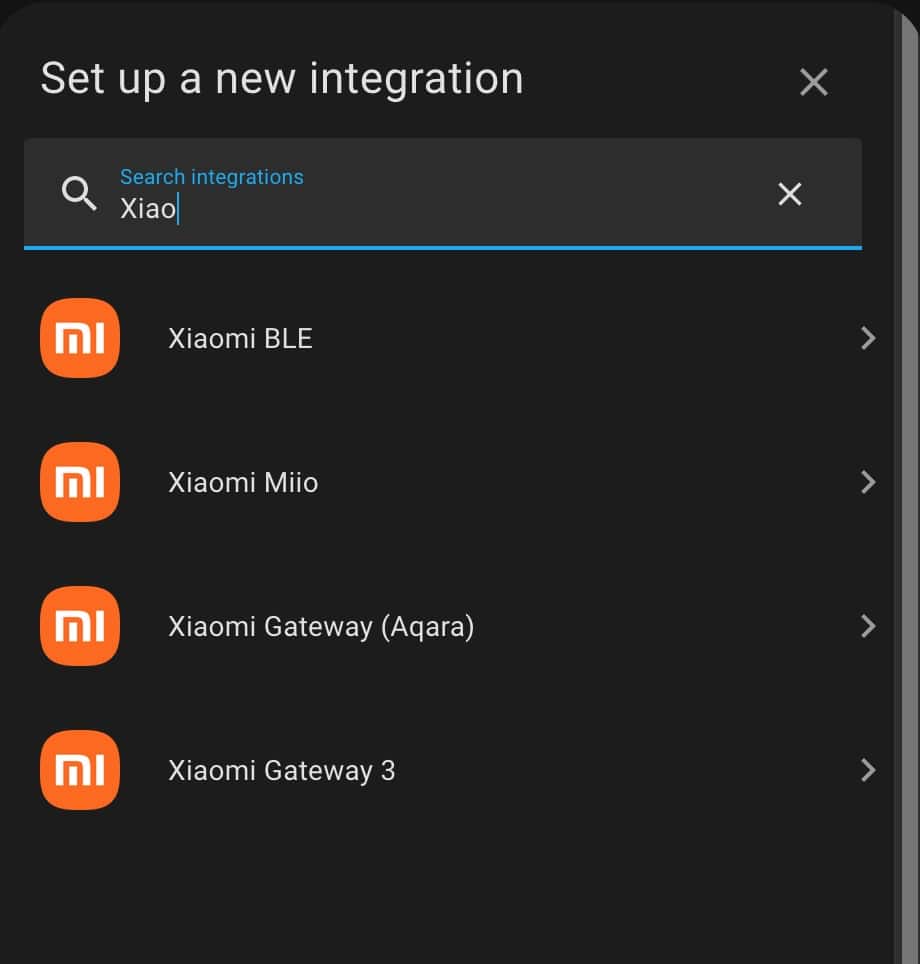
“Xiaomi Gateway 3” should be available now.
So, choose it and choose “Add Gateway with using taking” option.
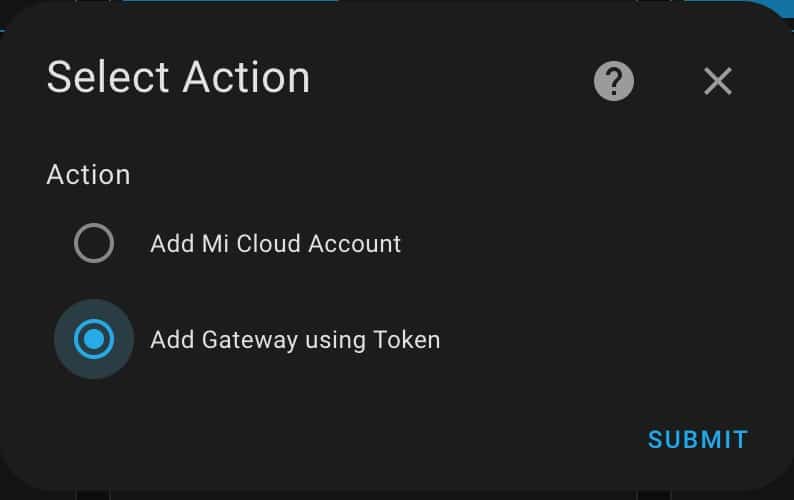
{"method":"set_ip_info","params":{"ssid":"\"\"","pswd":"123123 ; passwd -d admin ; echo enable > /sys/class/tty/tty/enable; telnetd"}}Now you need IP address and token which were obtained in the step “GET DEVICE TOKEN OF YOUR XIAOMI GW” above in this guidance.
The “open telnet command” please get below:
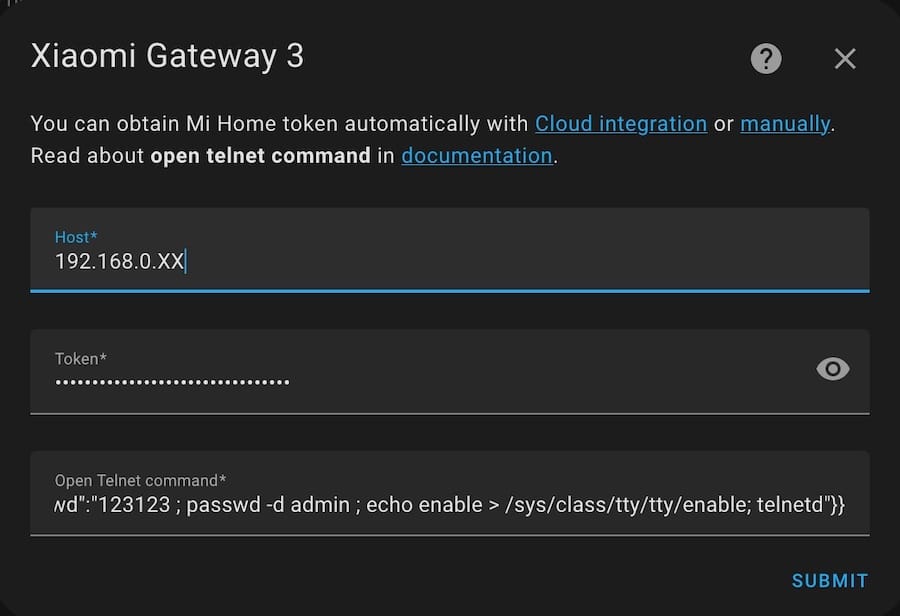
Submit and open telnet in your Gateway!
You can choose the Area now or set it later when you need it.
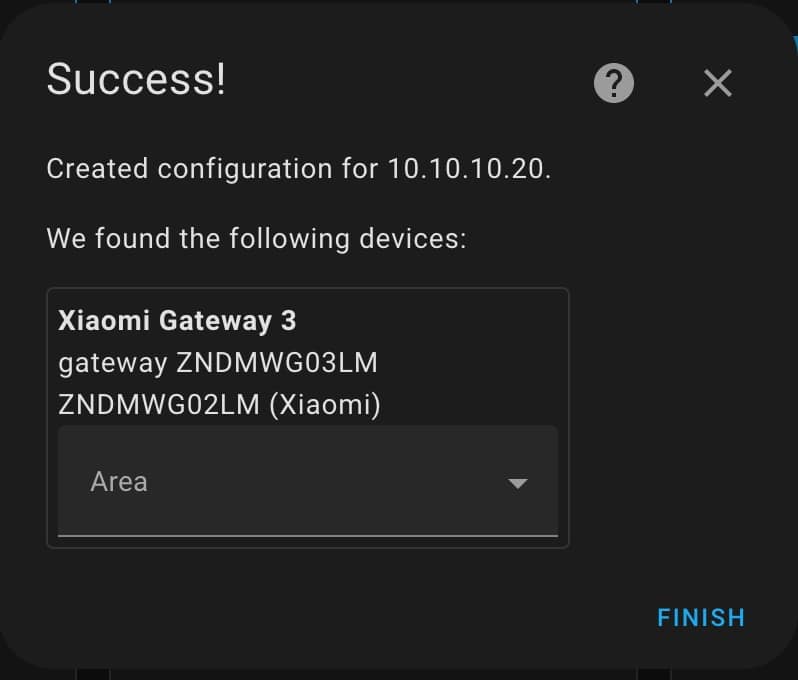
A new integration will be added!
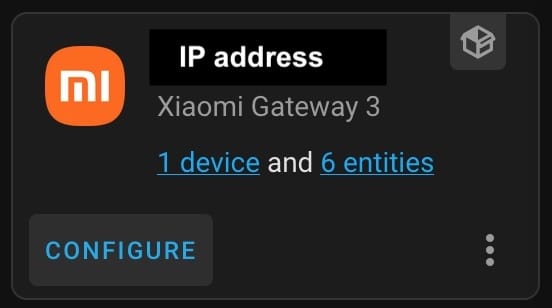
Please press the “CONFIGURE” button for further configuration.
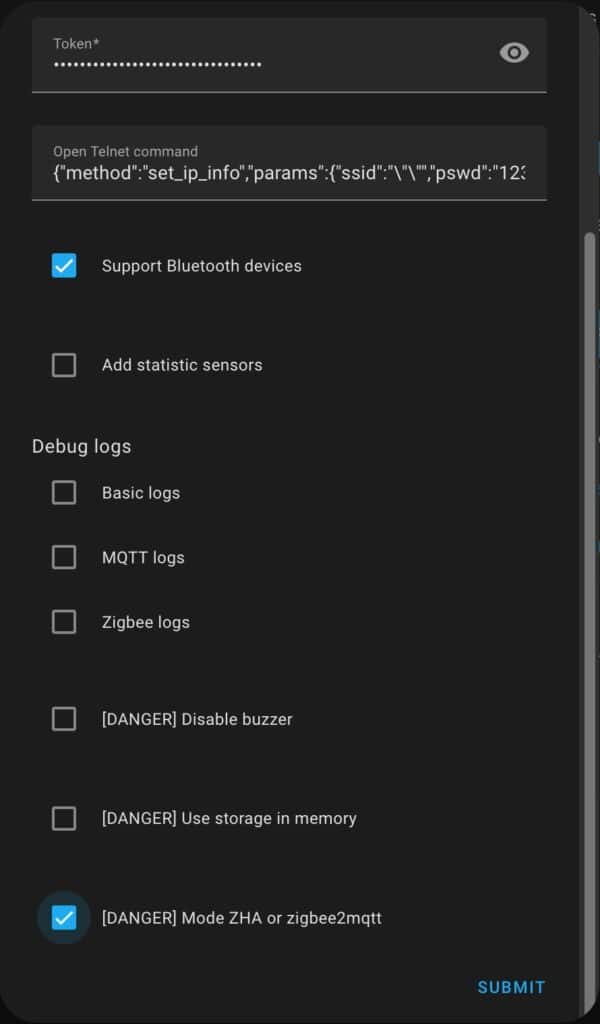
Please use “Mode ZHA or zigbee2mqtt” for allowing further connection Zigbee devices compatible with Zigbee2MQTT regardless of the manufacturer.
Submit and be patient because the configuration can take a time.

Now pay attention to HA left bar. You should see a new notification where with the necessary configurations for ZHA and Zig2MQTT Addons.
It should look like:
For ZHA, goto:

Configuration > Integrations > Add Integration > Zigbee Home Automation:

    Radio Type: EZSP
    Path: socket://YouGW_IP:8888

For zigbee2mqtt, goto:

Supervisor > Zigbee2mqtt > Configuration:

serial:
  port: 'tcp://YouGW_IP:8888'
  adapter: ezsp
Now you are ready to configure Zigbee2MQTT configuration which you can find in my article “Integration between Zigbee2MQTT and Home Assistant”