Integrating Dahua cameras into the Satel TSI panel can be a surprisingly time-consuming process. The challenge isn’t just making the connection; it’s meeting Satel’s very specific, and largely undocumented, video encoding requirements. If even one setting is slightly off—like the bitrate type or the H.264 profile—the panel will simply show a blank screen.
Let’s break down the exact configuration needed to get your video feed live on the panel.
Dahua Camera Configure
To ensure compatibility, you must use the camera’s web interface to adjust the Sub Stream 1 settings. The Satel TSI panel is very sensitive to bitrate and compression; if these values are exceeded, the stream will fail to initialize.
Apply the following parameters exactly as shown:
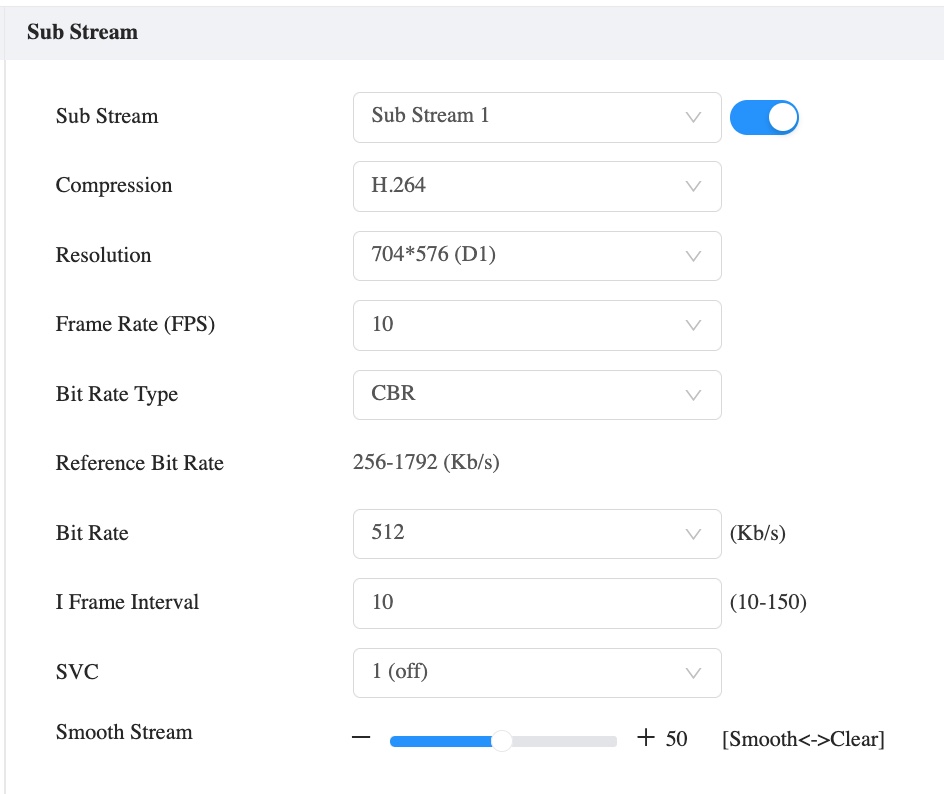
| Setting | Value |
| Sub Stream | Sub Stream 1 (Enabled) |
| Compression | H.264 (Avoid H.265 or H.264B/H) |
| Resolution | 704 × 576 (D1) |
| Frame Rate (FPS) | 10 |
| Bit Rate Type | CBR (Constant Bit Rate) |
| Bit Rate | 512 (Kb/s) |
| I Frame Interval | 10 |
| SVC | 1 (Off) |
| Smooth Stream | 50 (Balanced) |
Why these specific settings?
H.264 & D1 Resolution: The TSI panel’s hardware decoder is optimized for older standards. Using D1 resolution ensures the image fits the widget without overtaxing the panel’s CPU.
CBR (Constant Bit Rate): VBR (Variable Bit Rate) can cause spikes that lead to the “Video Lost” message on your screen. CBR keeps the data flow predictable.
I Frame Interval: Setting the I-Frame interval to match the FPS (10) ensures the panel receives a full “refresh” frame every second, keeping the latency low.
Add Your Camera to TSI Panel
Now that the camera is broadcasting in a format the panel can understand, follow these steps to add it to your interface:
Create a New Tab: In TSI Builder, add a new tab dedicated to your surveillance feed.
Add the Widget: Take the Camera widget from the side panel and place it on your workspace.
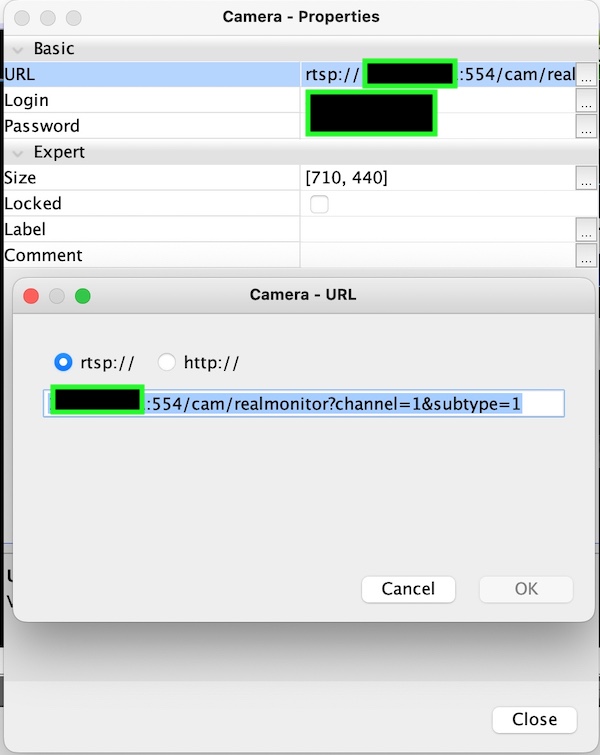
Configure the Parameters: Right-click the widget, open the Properties menu, and input the following details:
- Protocol: rtsp
- URL: YOUR_CAMERA_IP:554/cam/realmonitor?channel=1&subtype=1
- Your camera’s login & password.
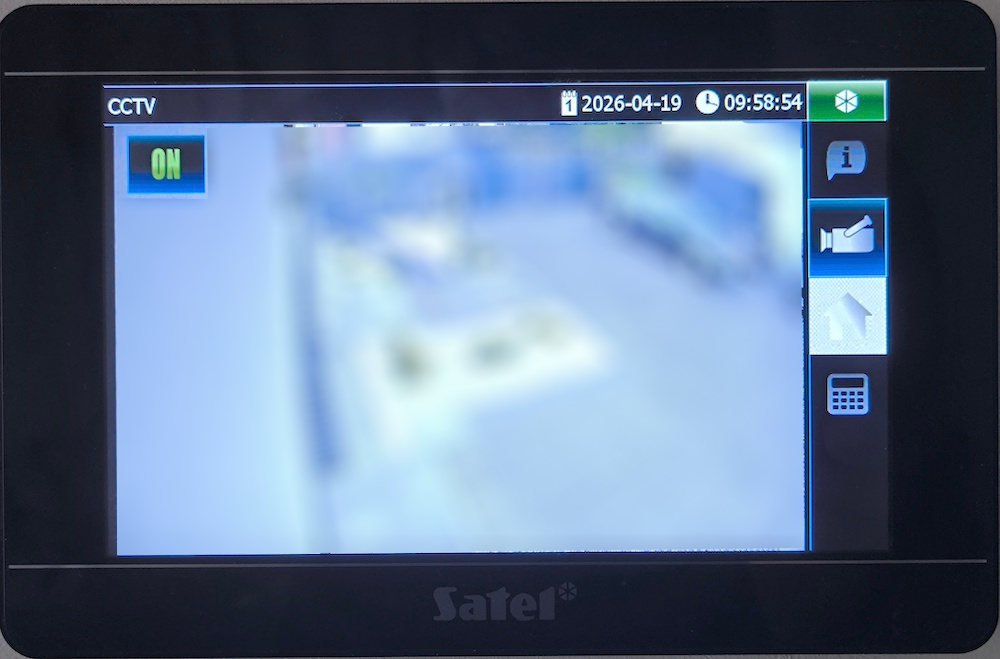
Final Test
After adding these parameters, compile and deploy your project to the panel. Because video processing is resource-intensive, give the panel a few seconds after the tab loads to initialize the RTSP handshake and display the live image.
Now, you can follow my other article, and add a button to TSI panel for activating and deactivating notifications in Home Assistant.