
Introduction
Purpose to use telegram
Home Assistant provides a lot of options for notifications. The most attractive of push notifications in HA mobile applications. But this approach requires HA cloud with a paid subscription to get notifications outside of your home network.
First of all, Telegram is free, stable, and provides bi-directional exchange with messages between you and your Home Assistant.
It doesn’t require configuring the web-hook and providing http access to your HA from anywhere.
Also, HA Telegram integration receives messages from allowed IDs (user or group). So, this solution looks pretty secure.
Purposes to write this article
Unfortunately, Home Assistant documentation is pretty complicated and requires a lot of effort to implement it.
Of cause, you can find a lot of articles on the Internet about this integration, but I was reading a lot of them during configuring my own integration.
Hence, I decided to collect my knowledge in this article and provide step-by-step guidance with examples for you.
Preparetions
Create your own bot
I assume that you have your own Telegram account if you reached my article. So, I won’t to spend time for the explanation on how to install the Telegram client and sign-up for it.
Telegram provides BotFather:
BotFather is the one bot to rule them all. Use it to create new bot accounts and manage your existing bots.
So, reach it by the link BotFather .

You can observe all available commands with /help command.
Let’s start to create your bot:
/startAlright, a new bot. How are we going to call it? Please choose a name for your bot.I’ll create the bot for the article to demonstrate the whole process.
Bot_for_my_articleGood. Now let’s choose a username for your bot. It must end in `bot`. Like this, for example: TetrisBot or tetris_bot.
Ok, let’s try again:
Bot_for_my_article_botDone! Congratulations on your new bot. You will find it at t.me/Bot_for_my_article_bot. You can now add a description, about section and profile picture for your bot, see /help for a list of commands. By the way, when you’ve finished creating your cool bot, ping our Bot Support if you want a better username for it. Just make sure the bot is fully operational before you do this. Use this token to access the HTTP API:
5792394527:AAG1KnVeD6P7mF5VQg-feyD0Ql3shdpaCCoKeep your token secure and store it safely, it can be used by anyone to control your bot.
Bot is created and the API key is provided for further integrations.
Prepare chats for interactions with your Home Assistant
You need chats IDs to send notifications from HA and receive commands in it.
So, I use group chat for notifications for me and my wife and direct messages with technical information for me.
The web-version of Telegram client is helpful to get these IDs.
Firstly you have to know your own Telegram ID for diect conversations with your bot.
There is the special GetIDs bot in Telegram. You should reach it and send the command:
/startAnd you will receive an answer with your Telegram ID which you have to use in the Home Assistant configuration.
Obtaining the ID of your group chat (if needed) is a bit tricky.
You should create a group in Telegram and invite your bot into it. Open the group in the web-version of Telegram client and pay attention to URL in your browser.
It should look like this:
https://web.telegram.org/k/#-xxxxxxxxxx
The tail of URL “-xxxxxxxxxx” is your group ID.
Pay attention to the difference of IDs format:
- xxxxxxxxxxxx – for your ID.
- –xxxxxxxxxxx – for group ID.
Groups IDs have the prefix “-” which must be used asis in HA cofiguration.
Prepare Home Assistant
I hope you use a supervised version of Home Assistant and have the ability to install add-ons easily.
Please my following articles if you struggling with installing a supervised version onto Raspberry OS or Debian forks (Ubuntu for example):
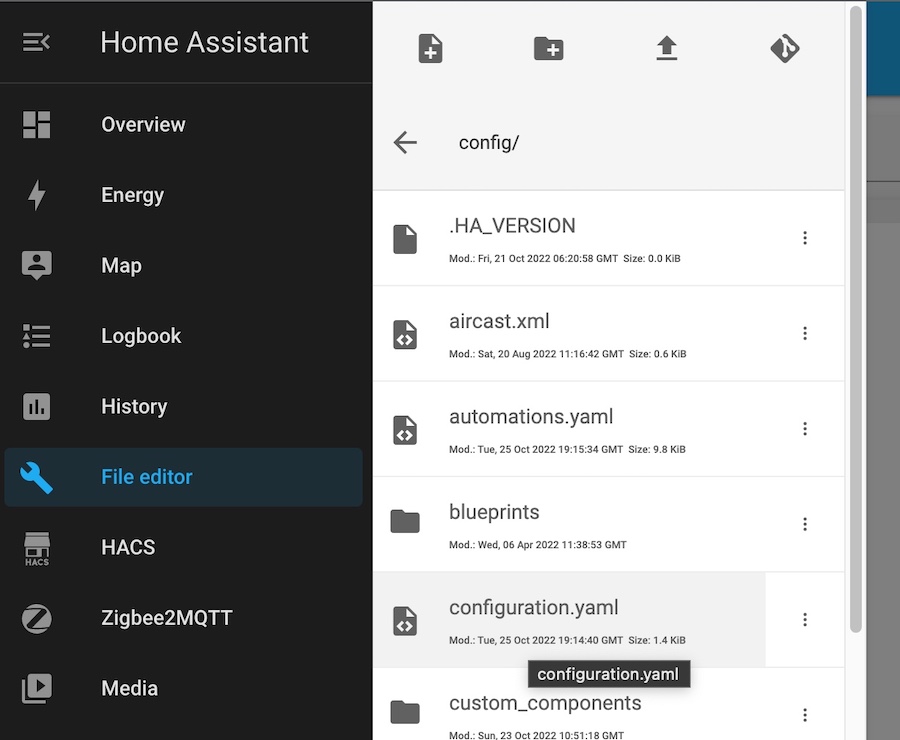
The configuration for the integration with Telegram has to be placed directly into /config/configuration.yaml file.
There is a very suitable plugin “File editor” for edit all config files of HA.
Install "File editor" plugin in Home Assistant
Please go to Add-ons menu: “Settings” – > “Add-ons”, click “ADD-ON STORE” button, and write “File Editor” into the search field:
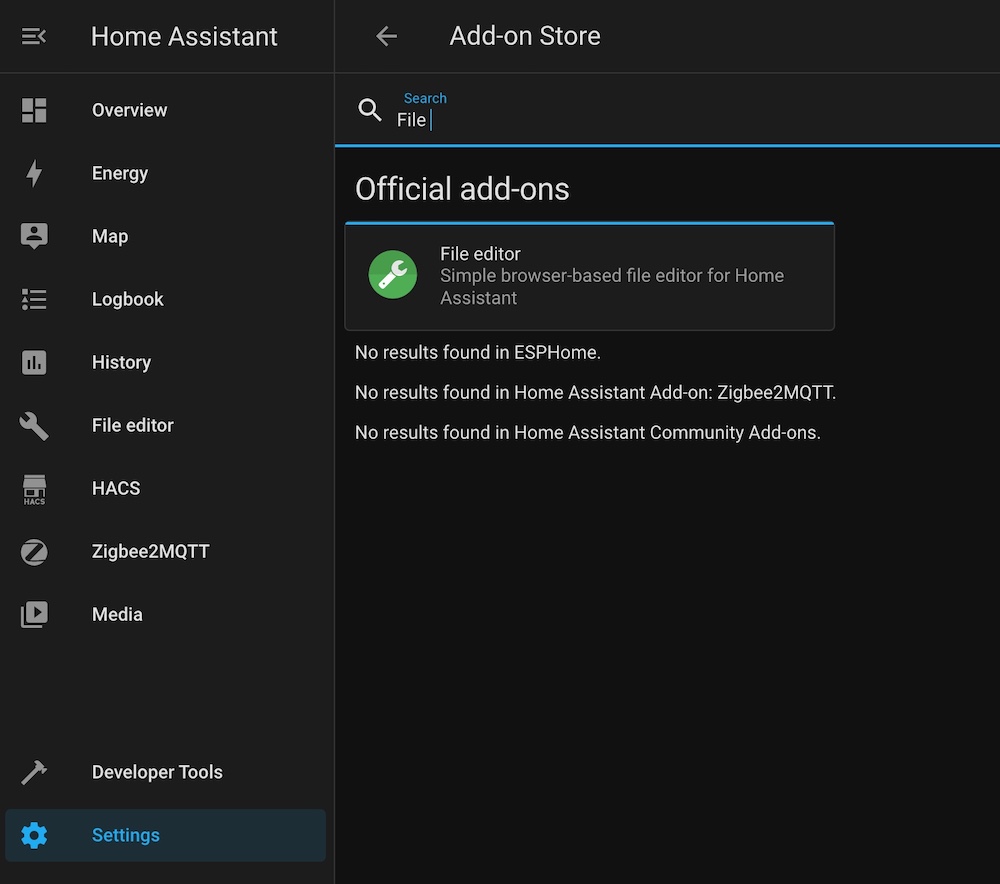
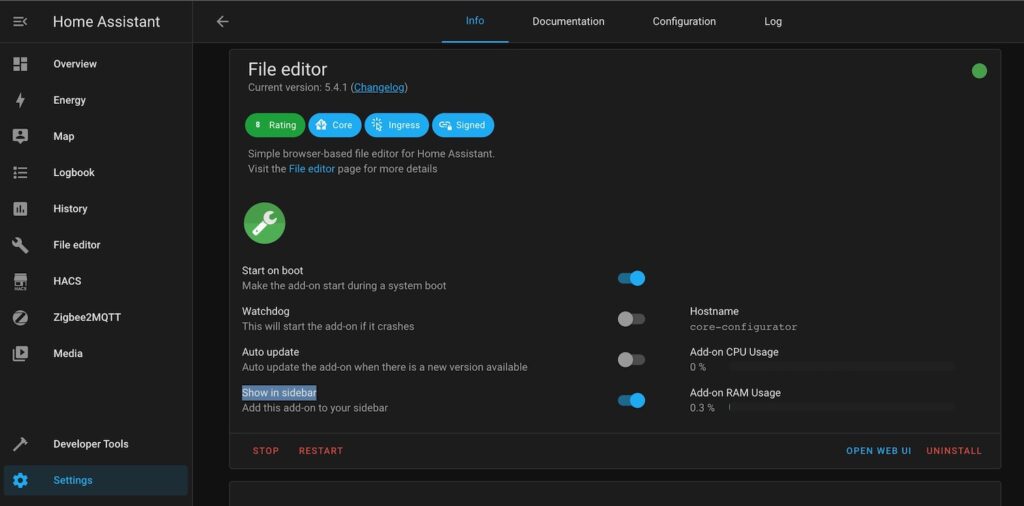
Install the Add-ons, and allow “Start on boot” and “Show in sidebar” options for more suitable use.
And start the Add-on.
Home assistant configuration
Configure Telegram Integration
Actually, you are ready for the final configuration.
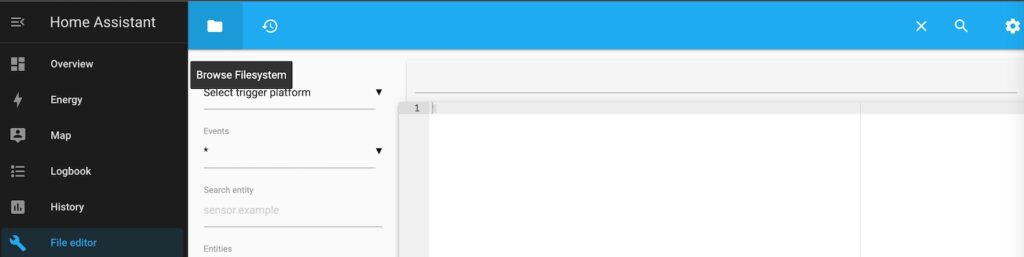
Open your “File Editor” add-on and browse to the config file:
Choose and open /config/configuration.yaml file.
The Telegram integration config includes two parts:
- The Bot config with permissions for chats to send and receive messages.
- Notification channels which are exact chats their bot has to place messages.
Let’s start from first one:
telegram_bot:
  - platform: polling
    api_key: 5792394527:AAG1KnVeD6P7mF5VQg-feyD0Ql3shdpaCCo
    parse_mode: html
    allowed_chat_ids:
      - -GroupID
- UserIDError sending message: Can’t parse entities: can’t find end of the entity starting at byte offsetLet’s configure notification channels:
notify:
  - name: telegram
    platform: telegram
    chat_id: -GroupID
  - name: telegram_to_me
    platform: telegram
    chat_id: UserID
There is an example for two channels:
- telegram – send messages to a group chat
- telegram_to_me – send messages to the individual user.
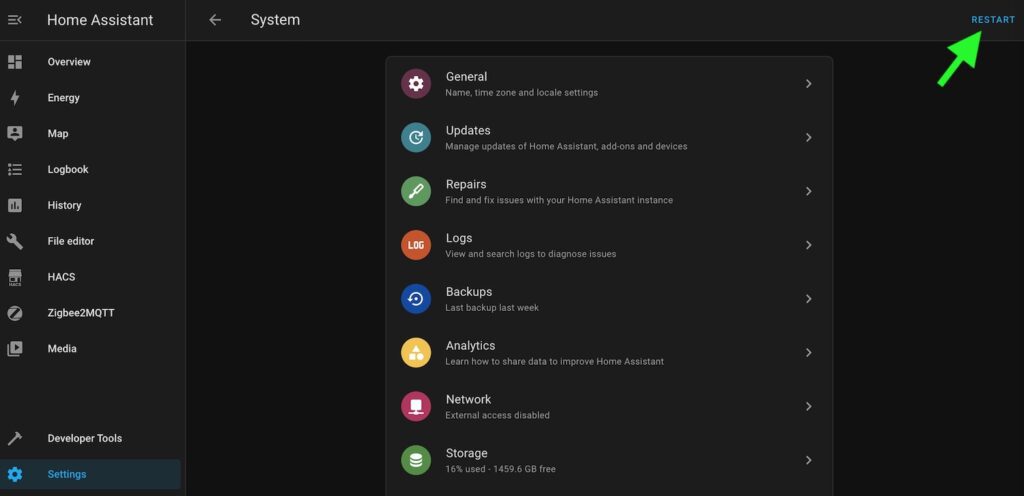
Please save your config file and restart your HA to apply the configuration.
Go to “Setting” -> “System” and click “Reboot” button.
Congratulations!
Your Home Assistant is ready for automation creation!
Check the integration
Let’s create a simple automation to see how sending and receiving messages work.
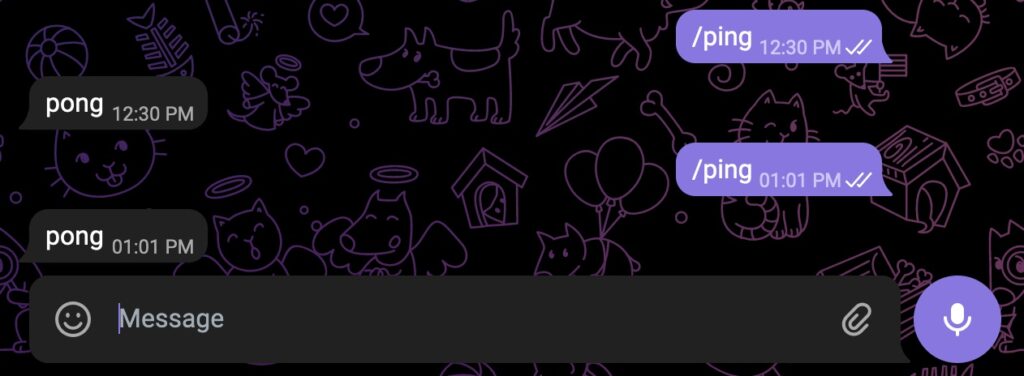
The following example is implementing a very simple dialog with your HA. It will answer with “pong” on your message “ping”.
It’s a stupid game, but you will have examples of sending and receiving messages.
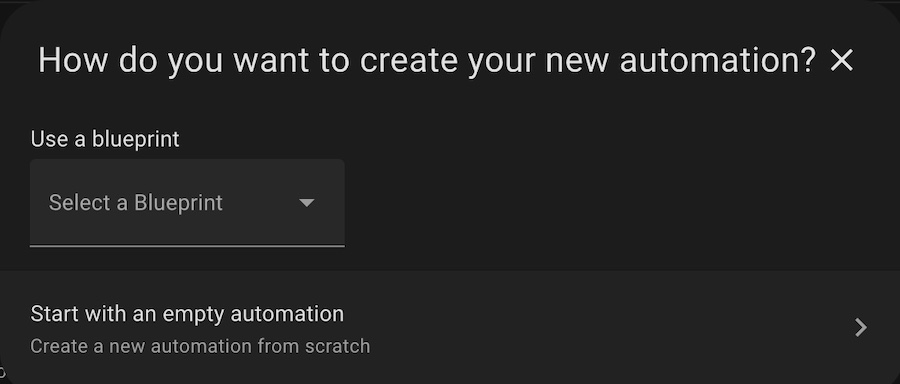
Please go to “Settings” -> “Automation and Scenes” screen and click on the “CREATE AUTOMATION” button.
And choose “Start with an empty automation” on a new window:
Add a new trigger and choose the “Event”:
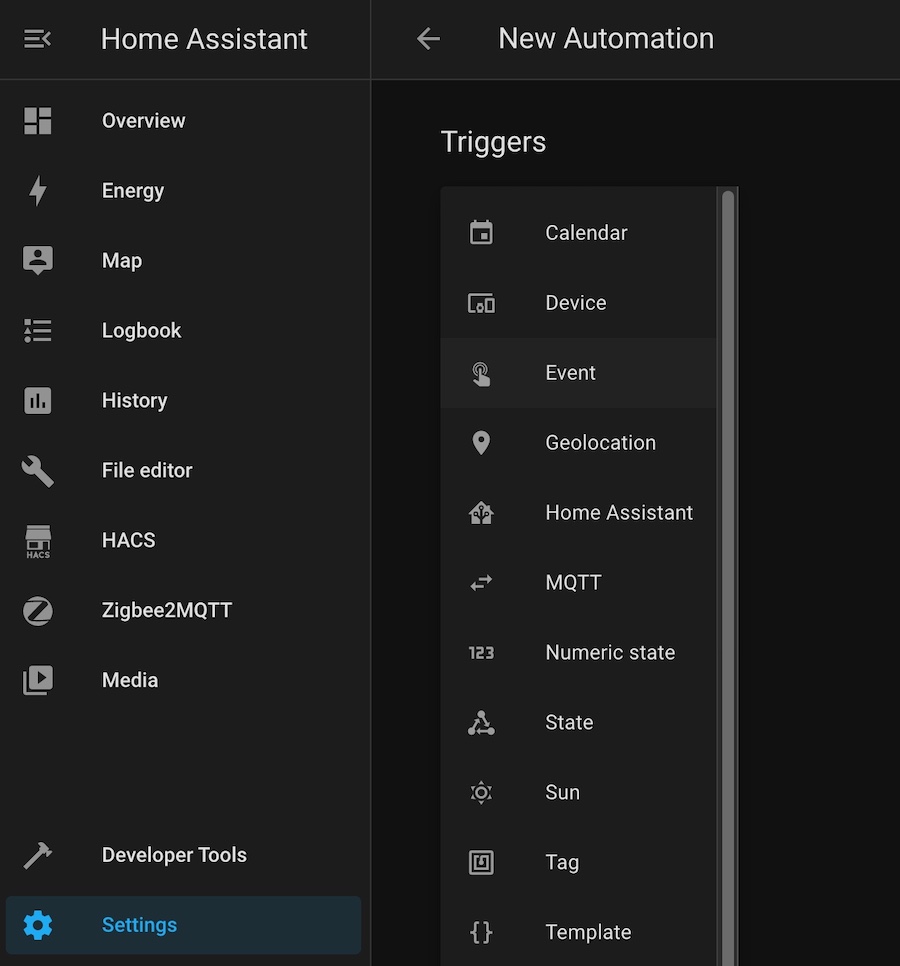
Configure your trigger with receiving the command from your bot:
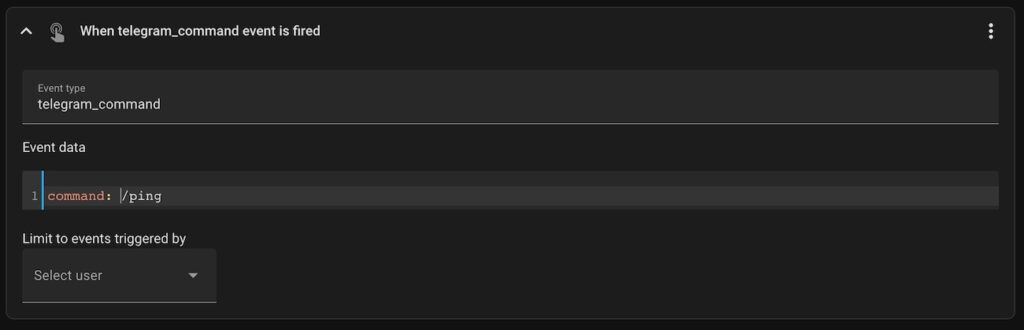
Also, you can configure your trigger in the yaml editor on automation constructor page:
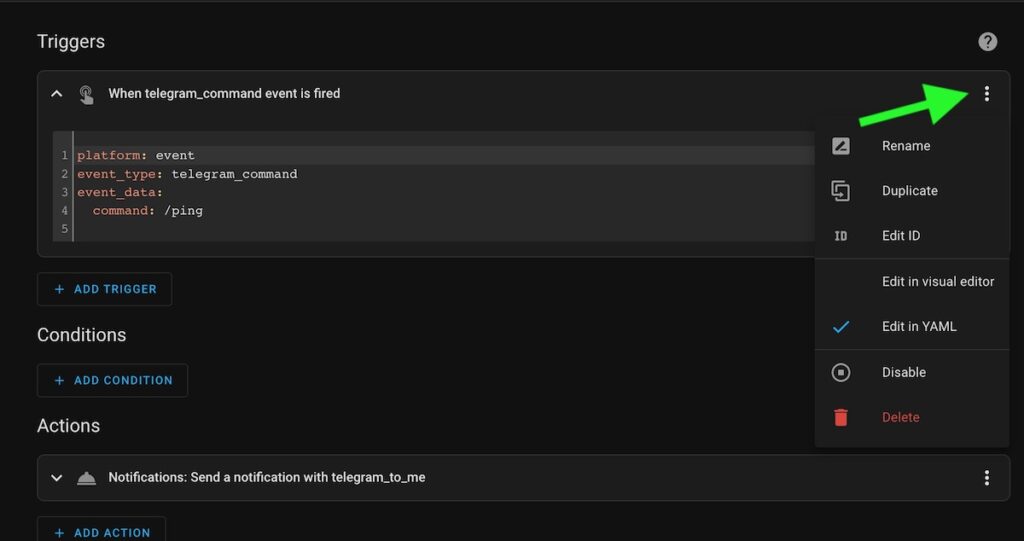
platform: event
event_type: telegram_command
event_data:
  command: /ping
Configure action execution with sending the message:
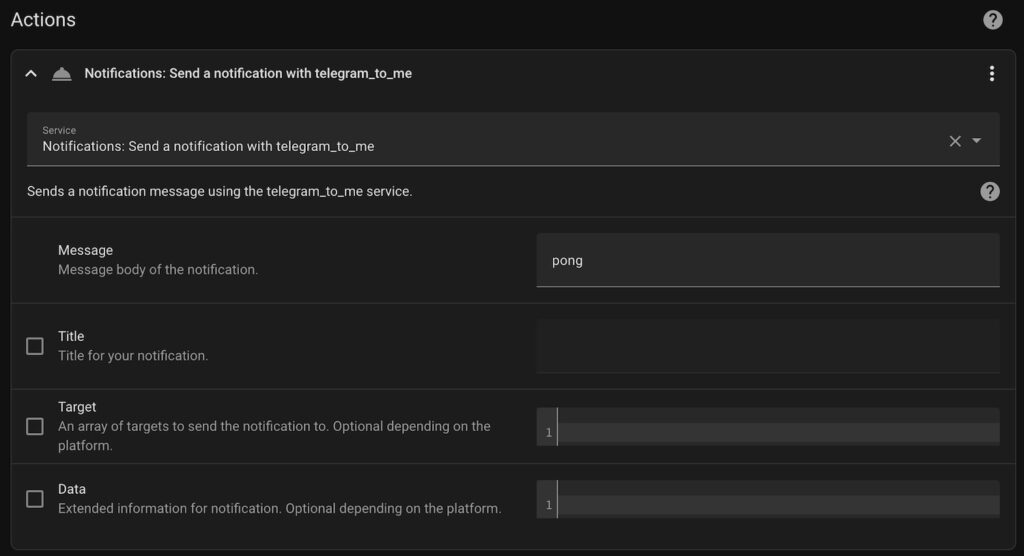
The YAML configuration:
service: notify.telegram_to_me
data:
  message: pong
The direct notification channel is used because user should ask “ping” directly and receive direct answers in personal chat.
But, feel free to play with a group chat.
Save your automation and try to send /ping commands to your bot. As a result, you should have a very sensefull dialog with your home assistant :)))))
Feel free to ask any questions in the comments for the article!