If you’re running Home Assistant in Docker and want to manage your ESP8266/ESP32 devices without leaving the HA interface, this guide is for you. We’ll set up the ESPHome Device Builder as a standalone Docker container and then embed it directly into the Home Assistant sidebar using the hass_ingress HACS integration — the same clean ingress experience you’d get on Home Assistant OS, but running entirely on Docker.
This is a natural follow-up to the previous guides on Migrating from Home Assistant Supervisor to Docker and Configuring Ingress Side Panels.
What Is ESPHome and Why Run It in Docker
ESPHome is an open-source system that lets you program and manage ESP8266 and ESP32 microcontrollers using simple YAML configuration files. Instead of writing firmware code by hand, you describe your device — its sensors, switches, lights, and connectivity — and ESPHome compiles and flashes the firmware automatically. Devices configured with ESPHome integrate natively with Home Assistant through the official ESPHome integration.
On Home Assistant OS, ESPHome runs as a built-in add-on with full Ingress support. On a Docker-based HA setup, there is no Supervisor, so ESPHome must be run as a separate container. The ESPHome project publishes an official Docker image (ghcr.io/esphome/esphome) that runs the same web-based Device Builder dashboard — the only challenge is wiring it back into the HA interface cleanly.
Why Embed ESPHome via Ingress Rather Than a Direct URL
You could just open http://your-server:6052 in a browser tab, but that approach comes with real drawbacks. Here’s how the options compare:
| Feature | Ingress (hass_ingress) | Direct Port / Iframe |
|---|---|---|
| HA sidebar integration | ✅ Yes | ❌ No |
| HA authentication gate | ✅ Yes | ❌ No |
| Works in HA mobile app | ✅ Yes | ❌ Unreliable |
| Exposes extra port publicly | ✅ Not required | ❌ Yes |
| WebSocket logs/compilation | ✅ Full support | ⚠️ Needs CORS config |
| Setup complexity | ✅ Minimal | ❌ Medium |
The Ingress approach proxies all traffic — including the WebSocket connections that power ESPHome’s real-time compilation logs — through Home Assistant’s own authenticated session. You get one login for everything and no extra ports to manage or secure.
Prerequisites
Before starting, make sure you have:
- Home Assistant Core running in Docker
- HACS installed (official guide at hacs.xyz)
hass_ingressintegration installed via HACS (see the Ingress Side Panel guide for full details)- All containers on the same Docker network
Add ESPHome to Your Docker Compose
Add the following service block to your existing docker-compose.yml. This is a production-ready configuration with resource limits, a static IP on the internal Docker network, and all the environment variables ESPHome needs to work correctly behind a proxy.
esphome:
    container_name: esphome
    image: ghcr.io/esphome/esphome:latest
    restart: unless-stopped
    deploy:
      resources:
        limits:
          cpus: "2.0"
          memory: 8G
    dns:
      - YOUR_DNS
    volumes:
      - /opt/HA/esphome:/config
      - /etc/localtime:/etc/localtime:ro
    ports:
      - "6052:6052"
    command: dashboard /config
    environment:
      - ESPHOME_DASHBOARD_USE_PING=true
      - ESPHOME_TRUSTED_DOMAINS=YOUR_DOMAIN, YOU_HA_INTERNAL_IP
    labels:
      - updates2mqtt.name="ESPHome Update"
      - updates2mqtt.compose_path=/opt/HA/docker-compose.yml
      - updates2mqtt.picture=https://esphome.io/_static/logo-text.svg
    networks:
      home_assistant:
        aliases:
          - esphome
        ipv4_address: 172.20.0.13
Make sure your docker-compose.yml already defines the home_assistant network with a matching subnet. For example:
networks:
  home_assistant:
    driver: bridge
    ipam:
      config:
        - subnet: 172.20.0.0/24
What Each Setting Does
Let’s walk through the non-obvious parts so you understand exactly what you’re configuring.
command: dashboard /config
This tells the ESPHome container to start in dashboard mode, serving the web UI from the /config directory (which maps to /opt/HA/esphome on the host). All your device YAML files live here.
ESPHOME_DASHBOARD_USE_PING=true
By default, ESPHome uses mDNS to check whether your ESP devices are online. mDNS doesn’t reliably cross Docker network boundaries. Setting this to true switches ESPHome to use ICMP ping instead, which works correctly from inside a container and will show your devices as online/offline accurately.
ESPHOME_TRUSTED_DOMAINS — the critical one
This is the environment variable most guides miss, and it’s the reason WebSocket connections for compilation logs fail when ESPHome is placed behind a proxy.
When hass_ingress forwards requests to ESPHome, the Origin header arriving at the ESPHome Tornado server reflects your HA domain — not localhost. ESPHome’s built-in origin check will reject this as a cross-origin request, causing 403 errors on WebSocket connections and silently breaking the compilation log viewer and the code editor.
Set this to a comma-separated list of your HA instance’s hostname(s) and/or IP address:
- ESPHOME_TRUSTED_DOMAINS=YOUR_DOMAIN, YOU_HA_INTERNAL_IPReplace these with your own HA hostname and/or local IP. If you access HA from both a domain name and a local IP, list both.
networks — alias and static IP
The aliases: [esphome] entry lets other containers on the same Docker network reach ESPHome by the hostname esphome, regardless of its IP. This is the hostname you’ll use in the hass_ingress configuration. The static ipv4_address is optional but recommended for a stable infrastructure.
Resource limits
deploy:
  resources:
    limits:
      cpus: "2.0"
      memory: 8G
ESPHome compiles firmware using PlatformIO, which can temporarily spike CPU and RAM. These limits prevent a compilation job from starving other containers. Adjust based on your hardware — 8 GB is generous and suitable for a server with 16 GB or more.
labels (optional)
The updates2mqtt labels are used by the updates2mqtt utility to expose container update availability as MQTT sensors in Home Assistant. Remove these lines if you’re not using it.
Create the Config Directory and Start the Container
Create the ESPHome config directory if it doesn’t exist:
sudo mkdir -p /opt/HA/esphomeThen start the new container:
cd /opt/HA
sudo docker compose up -d esphome
Verify the container started correctly:
sudo docker logs esphomeYou should see a line like:
INFO Starting dashboard web server on port 6052 and configuration dir /configAt this point you can also verify the dashboard is reachable directly at http://YOUR_SERVER_IP:6052 before setting up the Ingress panel.
Add ESPHome to the HA Sidebar via hass_ingress
Open your Home Assistant configuration.yaml and add the following entry under the ingress: block. If you don’t have an ingress: block yet, create one.
ingress:
  esphome:
    title: ESPHome
    icon: mdi:chip
    url: http://esphome:6052
    work_mode: ingress
    ui_mode: toolbar
⚠️ Important Notes:
- The
urluses the Docker network aliasesphome— this resolves internally between containers on the same network. Never uselocalhostor127.0.0.1here, as those would point to the HA container itself, not ESPHome. work_mode: ingressis required. It makeshass_ingressact as a true reverse proxy, forwarding all HTTP and WebSocket traffic including the real-time log streams. Usingwork_mode: iframewill not forward WebSockets and the ESPHome editor and compilation logs will not work.ui_mode: toolbarkeeps the HA top toolbar visible. Useui_mode: normalto hide it and give ESPHome more vertical space.
Restart Home Assistant and Reload Ingress
The first time you add a new panel, a full Home Assistant restart is required:
cd /opt/HA
sudo docker compose restart ha
After the initial setup, if you only modify the ingress: block in configuration.yaml (adding or changing panels), you can reload without a full restart. Go to Developer Tools → YAML in the HA interface and click INGRESS to reload only the Ingress configuration.
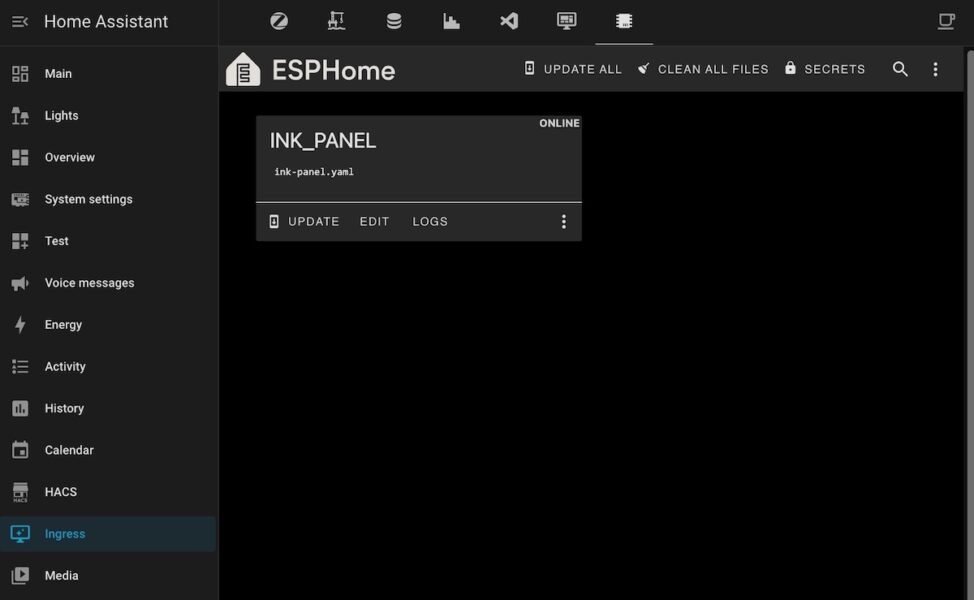
Once restarted, the ESPHome entry should appear in the Home Assistant sidebar. Clicking it opens the ESPHome Device Builder directly inside the HA interface, authenticated through your HA session.
Troubleshooting
ESPHome panel loads but logs and editor don’t work (403 errors)
This is almost always ESPHOME_TRUSTED_DOMAINS. Check the ESPHome container logs:
sudo docker logs esphome | grep -i "403\|origin\|forbidden"If you see 403 responses on /logs, /ace, or similar endpoints, your HA domain or IP is not listed in ESPHOME_TRUSTED_DOMAINS. Add it and recreate the container:
sudo docker compose up -d --force-recreate esphomeAll devices show as offline
Ensure ESPHOME_DASHBOARD_USE_PING=true is set. mDNS-based discovery doesn’t work inside Docker. Also verify the ESPHome container’s DNS settings point to a resolver that can resolve your device hostnames, especially if you use local DNS (like Pi-hole or AdGuard Home) for your .local names.
Panel doesn’t appear in the sidebar
Confirm the hass_ingress integration files are in /config/custom_components/ingress/ and that Home Assistant was fully restarted (not just reloaded). Check logs under Settings → System → Logs for any errors mentioning ingress.
Compilation fails or build environment is missing
On first use, ESPHome downloads the PlatformIO build environment for each target platform. This can take several minutes and requires internet access. Make sure the ESPHome container can reach the internet (check your DNS entries and network routing). The dns: entries in the compose config point to your internal DNS servers — ensure they can forward external queries.
Conclusion
With about 30 lines of Docker Compose configuration and a two-line entry in configuration.yaml, you get ESPHome fully integrated into Home Assistant’s sidebar — complete with authenticated access, real-time compilation logs, the code editor, and OTA firmware updates. The key insight that makes it all work is the ESPHOME_TRUSTED_DOMAINS environment variable, which allows ESPHome’s Tornado server to accept WebSocket connections originating from your HA domain rather than rejecting them as cross-origin requests.
This setup also means you can keep port 6052 closed at the firewall level entirely — all access goes through HA’s ingress proxy, so ESPHome is never directly exposed.
For further reference, see the hass_ingress repository and the ESPHome documentation.